Icon - Arrow LeftAn icon we use to indicate a rightwards action. Icon - Arrow RightAn icon we use to indicate a leftwards action. Icon - External LinkAn icon we use to indicate a button link is external. Icon - MessageThe icon we use to represent an email action. Icon - Down ChevronUsed to indicate a dropdown. Icon - CloseUsed to indicate a close action. Icon - Dropdown ArrowUsed to indicate a dropdown. Icon - Location PinUsed to showcase a location on a map. Icon - Zoom OutUsed to indicate a zoom out action on a map. Icon - Zoom InUsed to indicate a zoom in action on a map. Icon - SearchUsed to indicate a search action. Icon - EmailUsed to indicate an emai action. Icon - FacebookFacebooks brand mark for use in social sharing icons. flipboard Icon - InstagramInstagrams brand mark for use in social sharing icons. Icon - PinterestPinterests brand mark for use in social sharing icons. Icon - TwitterTwitters brand mark for use in social sharing icons. Icon - Check MarkA check mark for checkbox buttons.
You are reading

DIY: Three Fabric Printing Techniques, Rolling Pin Included

Search

DIY: Three Fabric Printing Techniques, Rolling Pin Included

October 2, 2013

Ever since we posted about Ariele Alasko’s hand-stamped upholstered chair, I’ve been on the lookout for more DIY fabric-printing ideas. I was pleasantly surprised when I came across Finnish photographer Kreetta’s blog Gretchen Gretchen. Over a three day creative streak, she tackled three easy DIY fabric-printing techniques. Here, she shows us her materials and results.

Photos by Kreetta Järvenpää of Gretchen Gretchen.   

DIY Three Fabric Printing Techniques Rolling Pin Included  portrait 3

Above: Starting with her trusty wooden rolling pin, she attached cut-out dots made of adhesive plastic foam.

DIY Three Fabric Printing Techniques Rolling Pin Included  portrait 4

Above: Kreetta rolled the pin over an old duvet cover that already had a romantic pattern. The new print was inspired by a pearl necklace.  

DIY Three Fabric Printing Techniques Rolling Pin Included  portrait 5  

Above. The rolling pin was also used to make this harlequin print. 

DIY Three Fabric Printing Techniques Rolling Pin Included  portrait 6 

Above: On day two, Kreetta carved a wooden block into an arrow pattern. 

DIY Three Fabric Printing Techniques Rolling Pin Included  portrait 7

Above: She used black ink for color. 

DIY Three Fabric Printing Techniques Rolling Pin Included  portrait 8

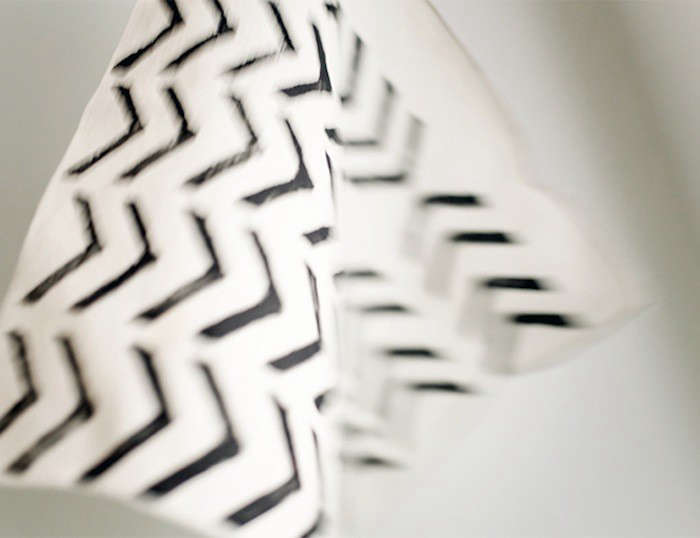
Above: She suggests buying the proper carving tools to save time and enhance the quality of the print. 

DIY Three Fabric Printing Techniques Rolling Pin Included  portrait 9

 Above: Lastly, Kreetta used a wooden block to which she glued craft foam cut into dots of different sizes.

DIY Three Fabric Printing Techniques Rolling Pin Included  portrait 10

 Above: She used old napkins and printed dots in four different colors. For the next go-around Kreetta plans to use linoleum and a carving set. 

Ready for more easy projects? Check out our collection of DIY posts. Happen to have a thing for rolling pins? Here are six that we love.  

(Visited 885 times, 1 visits today)
You need to login or register to view and manage your bookmarks.

Have a Question or Comment About This Post?

Join the conversation

v5.0