I have learned, over the past 79 days or so, that the apartment I moved into in January is not a good summer apartment. No matter which way my partner and I configure the four windows in our place—windows open in the front and the back of the apartment, to catch a cross-breeze; front windows open only; all windows open, with shades drawn to keep out the sun—there’s not hint of air flow to be had. It is totally, completely still, and stifling hot.
Which means I—who, in my last apartment, had the luxury of being anti-AC and pro-breeze—have had no choice but to surrender to air conditioning. We’re fortunate that a window unit came with the place, slotted into a window in our bedroom that looks out at a narrow alley. I don’t know what we would do without it. The bedroom, in particular, has turned into a heat box. We’ve learned to turn on the AC for a half hour before bed, with the door closed, then turn it off and train a heavy-duty fan on the bed all night.
As life-saving as it is for a New York City summer, this AC unit is ugly. It’s a dull, yellowed beige color, and somebody (probably the previous tenants) sealed bits of it with duct tape. It does the trick, but I don’t want to have to look at it for the twenty-three and a half hours it’s not in use each day.
Matt had the idea of building a cover for it, and one day when he was at work, I decided to do it myself. The result is nothing fancy, but it’s lightweight and does a good job of keeping the ugly bulk of the AC unit hidden away.
Behold: the easiest, cheapest DIY AC cover you can make at home (with materials, I might add, from the art supply store).

Materials
You’ll need:
- Measuring tape
- Four strips of lightweight wood, cut to your window/AC dimensions. I used 2″ wide balsa and basswood strips from Blick Art Materials, $1.99 each. (I would’ve used all basswood, since it’s much sturdier, but only balsa came in strips long enough for our wide windows. You can also get wood cut so you’re not hemmed in by lengths. More on that later.)
- Wood glue
- Small screws or nails (optional)
- Canvas, a flour sack dish towel, or other simple fabric. This project would be yet another nice use for a canvas drop cloth, but I used the cheapest painter’s canvas I could find at Blick: I paid $5.17 for a yard.
- Staples and staple gun
Method
1. Measure.
Measure the interior of your window where you’d like the cover to sit. For the height, be sure to measure a bit generously from the top of the AC unit; for the length, subtract a half inch or so to ensure your cover will fit snugly within the window. (I made my frame to the exact measurement the first time and it didn’t fit.)
An important note: We have deep windowsills, so I opted for narrow strips of wood that would stand up on their own, like a frame, in front of the AC unit, and still leave quite a bit of bare windowsill. If you have shallower sills, and your unit overhangs them into your living space, retrofit this design with wider pieces of wood, so that you end up with less of a frame and more of a deep box that can fit snugly over your unit. (The bottom can fit snugly between unit and sill.)
2. Make a frame.
Cut your four pieces of wood to size: two strips for the length you measured, two strips for the height. The wood that I got from the art supply store was thin enough that I cut it with an X-Acto knife (I wanted my frame to be extra lightweight), but you could also use hardier wood and have it cut to your measurements.
Also note: If you find a ready-made frame that fits your measurements, even better. I made my own because I wanted it to fit perfectly, and no frame I could find was just right.

Glue the four lengths of wood into a rectangular frame using wood glue, one corner at a time, using something with a right angle (like a notepad) to ensure that all of the corners are square. Hold each corner in place as it dries.
Leave the frame for at least half an hour to let the glue harden. Then, if the wood is thick enough, you can add some hardware to secure it if need be. Mine was fairly sturdy, and the wood was thin, so I added triangular supports in each corner, cut from spare pieces of wood and adhered with wood glue, instead.

3. Cut and position the cloth.
Lay out your cloth and measure the length and width of your frame, with three extra inches added to each measurement. My frame measured 33 inches long by 16 inches high, so I traced a 36- by 19-inch rectangle. Cut it out and—this is important—steam or iron the cloth. It’ll be harder to get out wrinkles once it’s on the frame. (I learned this the hard way.)


Lay your cloth over your frame and tuck it down inside. It should lay flat and tight along the bottom (this will be the front of the cover). Trim the sides if they overhang the wood frame.

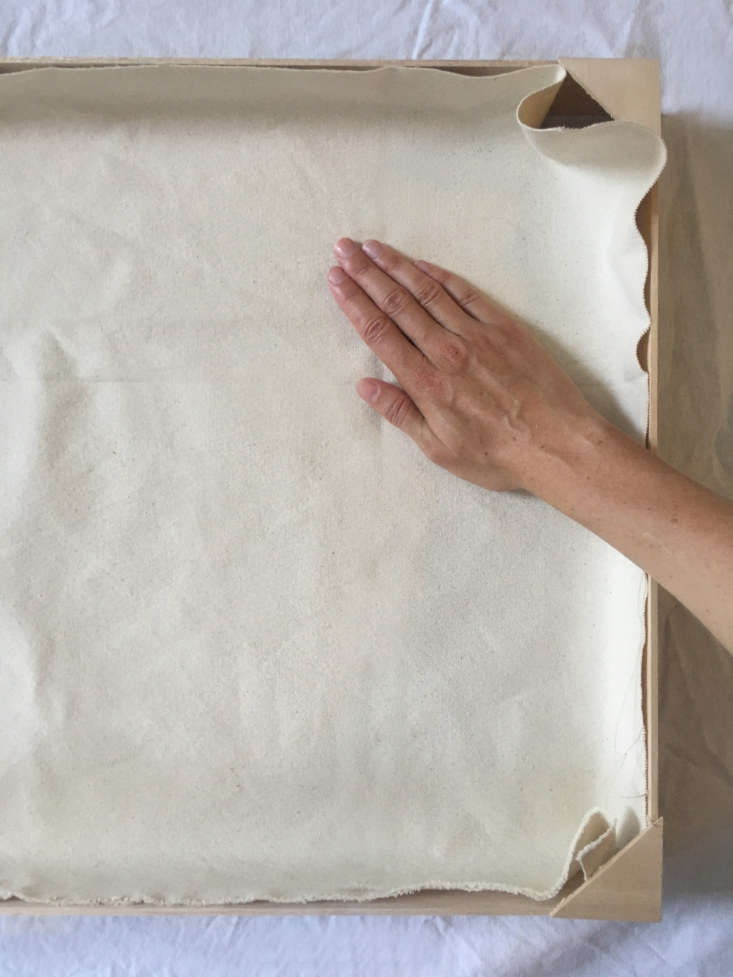
Another note: You could also stretch the cloth over the front and sides of the frame if you don’t want to see the wood.
4. Staple it in place.


Using a staple gun, staple the canvas to one side of the frame as close to the bottom of the wood as you can. Then, turn to the opposite side of the frame, pulling the canvas taut across and stapling it in place on that side. Repeat, working across opposite sides, always pulling the canvas taut.
(My wood was thin enough that a regular old stapler did the trick, but once I procure a heavy-duty staple gun I’m going to do this part over again. I’d like to get the canvas much tighter and snugger.)


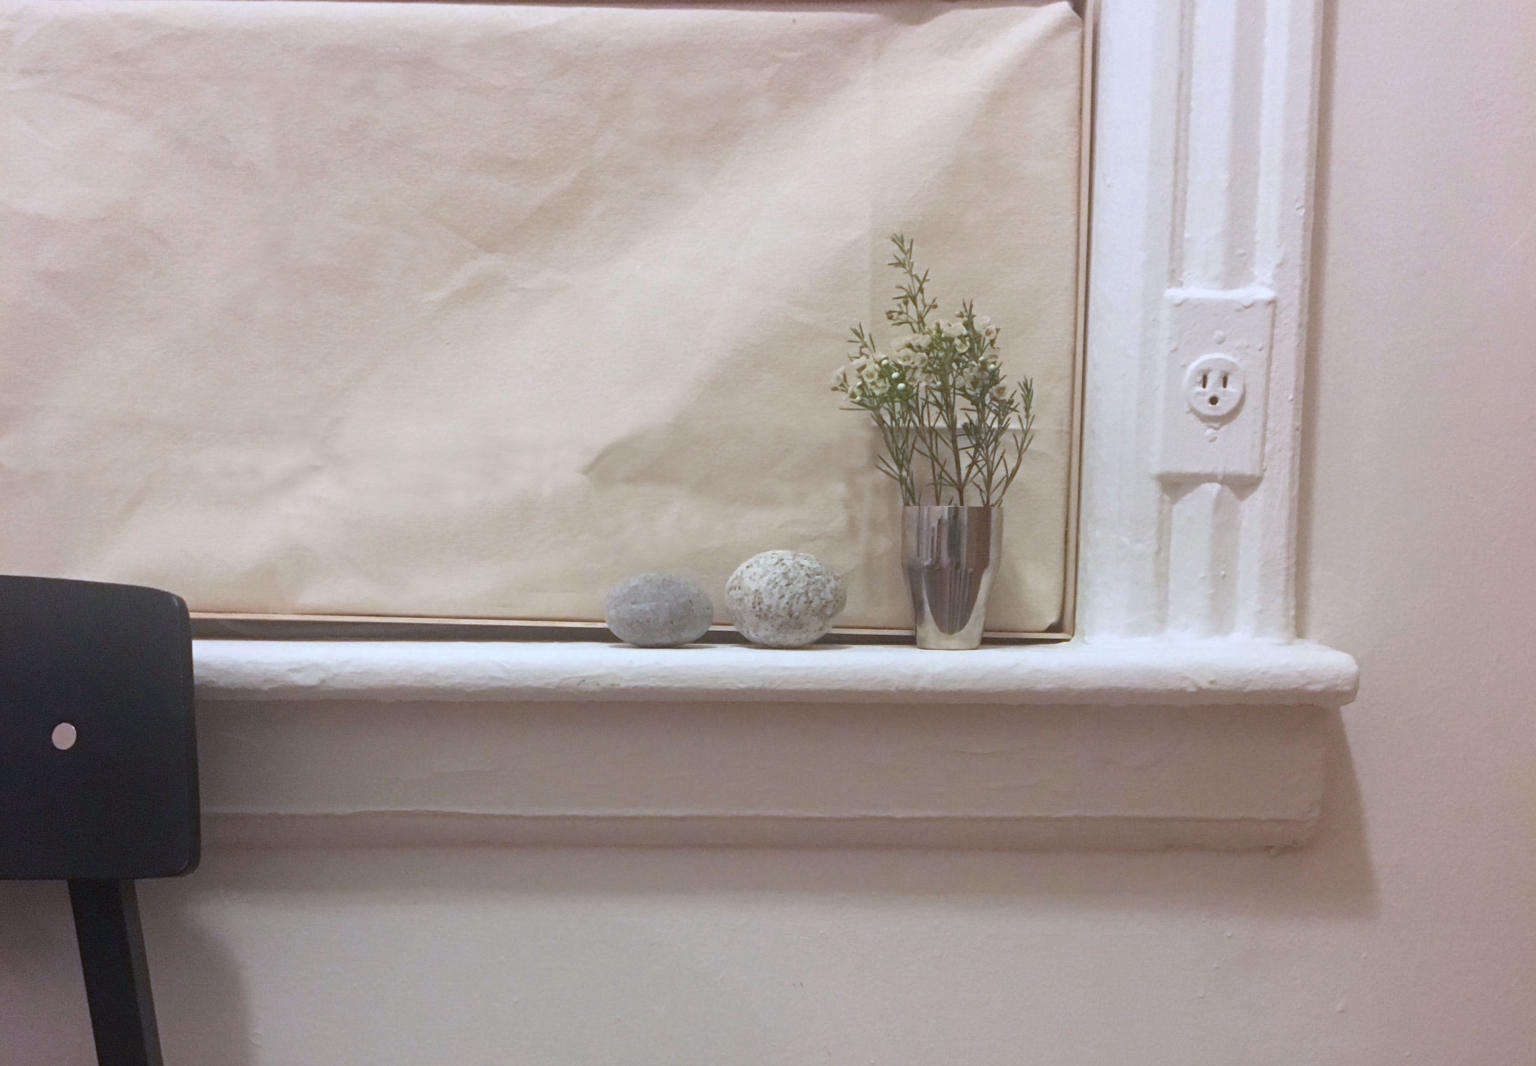
5. Set into the window and admire.

The End Result


All told, this project took me less than three hours (a walk to the art supply store included) and cost $15. It’s a simple solution but already it’s an improvement on the unsightly realities of summer in the city.
Trying this yourself? Try a scrap of linen—even caning—instead of canvas. Paint the frame. And alter the dimensions to whatever works for you.
More DIYs that come in handy for summer:
- DIY: How to Make the Simple Cooling Cloths from The Lost Kitchen in Freedom, Maine
- DIY Essential Oils in the Home: All-Natural Insect Repellent
- DIY: A Summery Side Table by Two Young Paris Architects

Have a Question or Comment About This Post?
Join the conversation