Icon - Arrow LeftAn icon we use to indicate a rightwards action. Icon - Arrow RightAn icon we use to indicate a leftwards action. Icon - External LinkAn icon we use to indicate a button link is external. Icon - MessageThe icon we use to represent an email action. Icon - Down ChevronUsed to indicate a dropdown. Icon - CloseUsed to indicate a close action. Icon - Dropdown ArrowUsed to indicate a dropdown. Icon - Location PinUsed to showcase a location on a map. Icon - Zoom OutUsed to indicate a zoom out action on a map. Icon - Zoom InUsed to indicate a zoom in action on a map. Icon - SearchUsed to indicate a search action. Icon - EmailUsed to indicate an emai action. Icon - FacebookFacebooks brand mark for use in social sharing icons. flipboard Icon - InstagramInstagrams brand mark for use in social sharing icons. Icon - PinterestPinterests brand mark for use in social sharing icons. Icon - TwitterTwitters brand mark for use in social sharing icons. Icon - Check MarkA check mark for checkbox buttons.
You are reading

L.A. Story: A Budget Kitchen Makeover, DIY Countertop Hack Included

Search

L.A. Story: A Budget Kitchen Makeover, DIY Countertop Hack Included

February 26, 2019

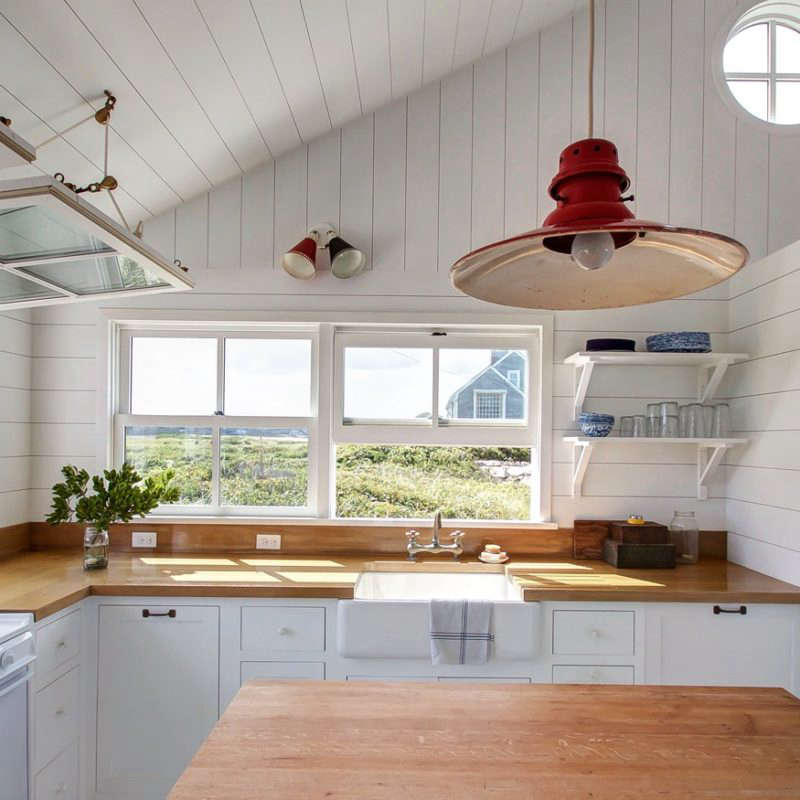
Last week, we received an email from Jessica Bunge, senior market editor at Emily Henderson Design, that grabbed our attention. She had recently renovated the small kitchen in her 363-square-foot apartment in Los Angeles. Among her design inspirations? The kitchen of Sarah Lonsdale, one of Remodelista’s founding team members. Would we like to see her remodeled space, she wondered.

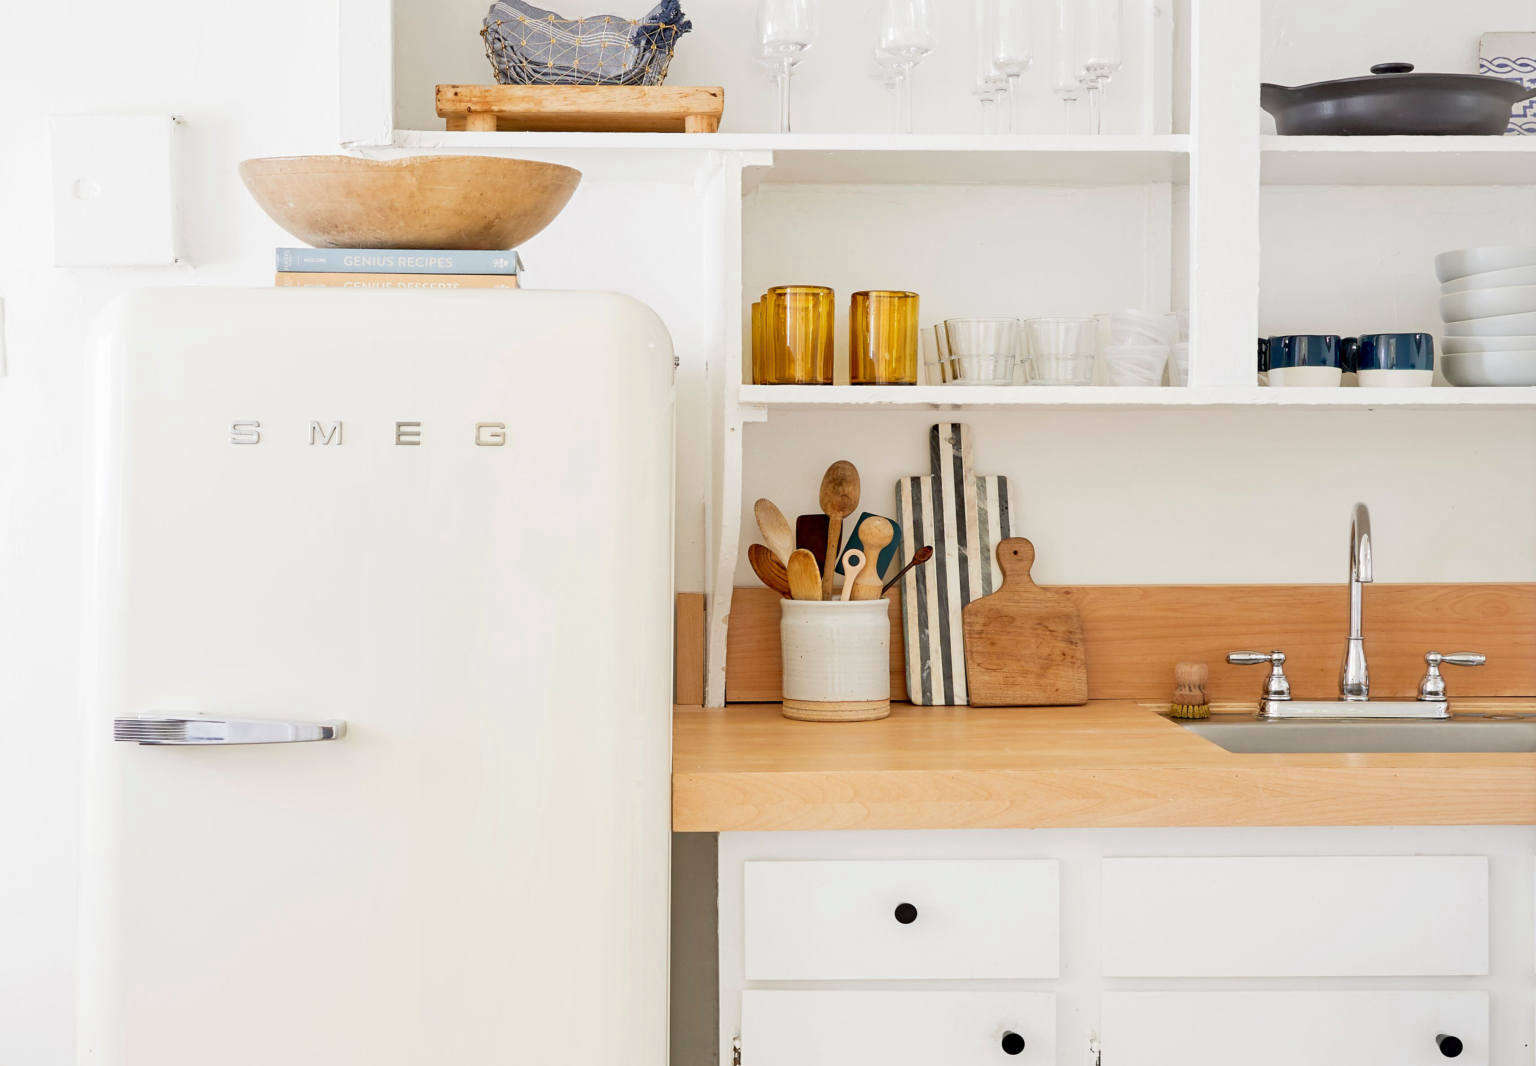
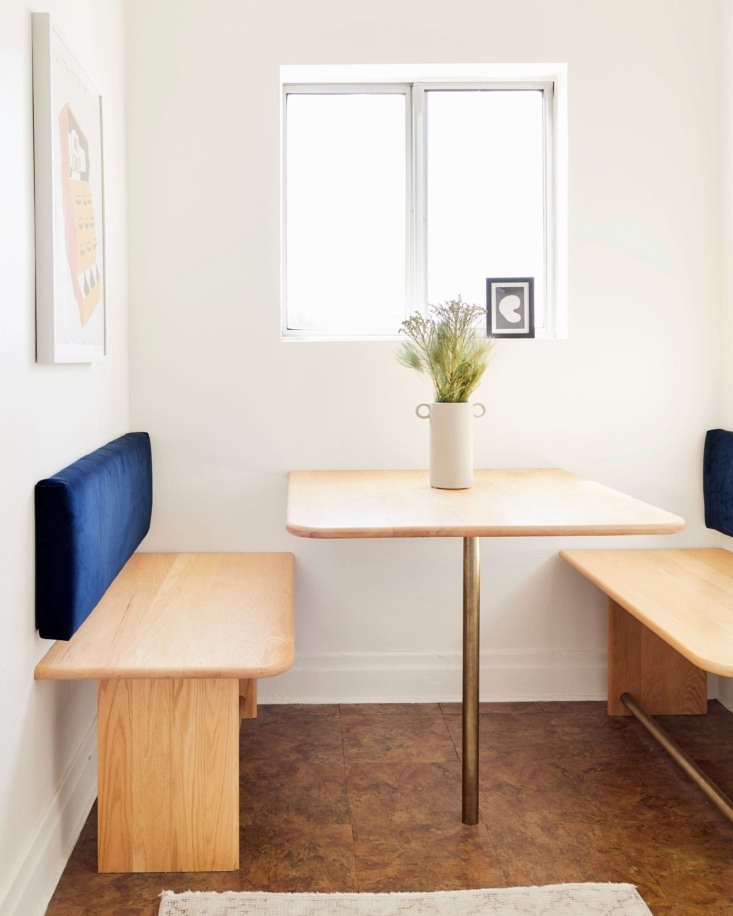
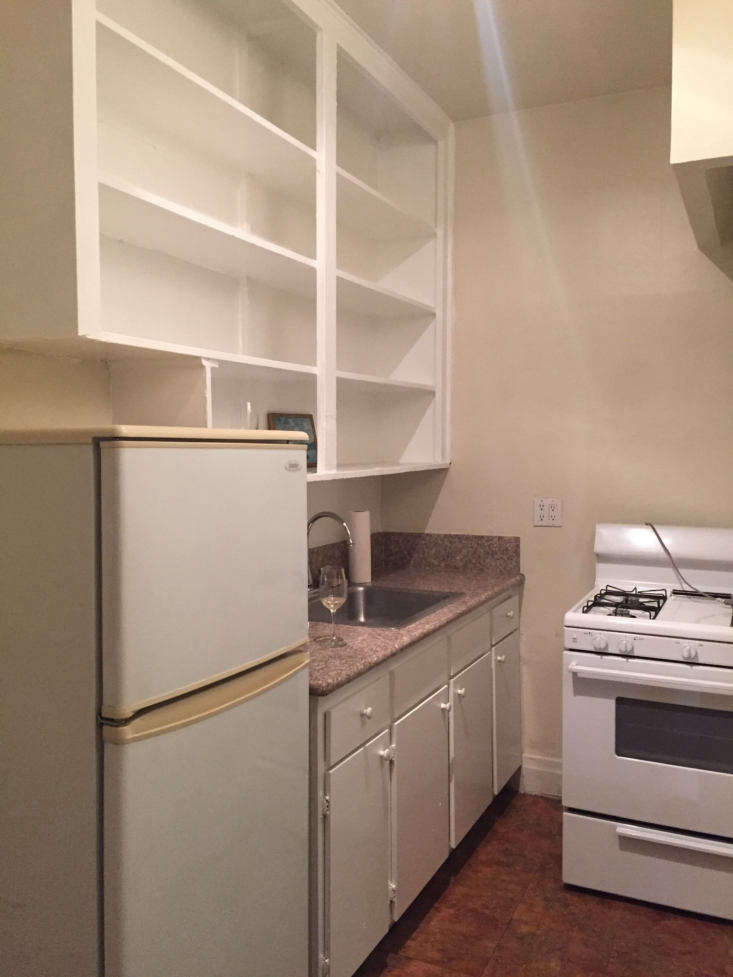
One look at the before/after pictures, and it was clear that we needed to write about it. From the chic built-in breakfast nook to the simple plywood countertop, which covers the unattractive countertop underneath—an idea she got from Sarah’s own rental hack—Jessica’s kitchen rehab is considered and smart.

And cost-conscious, too: The entire DIY project cost about $2,000 ($1,000 for the built-in projects and $1,000 for the decor), thanks to a handy and willing father. “My dad built, then I sealed and installed. I am very aware that this kitchen would have hit my wallet much harder had I not had my dad do all the craftsman work,” says Jessica.

Take a look at what they were able to accomplish together—on a budget. Then head over to Emily Henderson’s blog to learn all the details of the makeover.

Photography by Sara Tramp, courtesy of Emily Henderson Design.

&#8\2\20;when i first walked into the kitchen, the absolute priority was to 17
Above: “When I first walked into the kitchen, the absolute priority was to somehow rectify the countertop,” says Jessica. “It was sad, dated, and bringing me down.” Her solution: Inspired by Sarah’s clever idea to cover unattractive counters with plywood, Jessica, with a huge assist from her dad, did the same with her countertop. She sealed it with a water-based matte finish.
 jessica didn&#8\2\17;t have to do much to the kitchen cabinets. & 18
Above: Jessica didn’t have to do much to the kitchen cabinets. “I just replaced the hardware on the lower cabinetry, but the uppers came that way! When I looked at the place for the first time, my heart stopped when I saw all the open shelving. In my head I thought it was the perfect excuse to buy only beautiful kitchenwares since they would be on display all day, every day,” she says.
jessica chose farrow & ball&#8\2\17;s pointing for the walls—&am 19
Above: Jessica chose Farrow & Ball’s Pointing for the walls—”the most perfect warm white.” She’s not sure what’s on the cabinets, as they were painted before she moved in. Jessica considered making over the linoleum floor with sticker tiles, but its unevenness would have made that difficult. Instead, she made do by covering much of the floor with a vintage Turkish rug. The mirror has been in her family for four generations. The landscape was a $20 flea market score. (See The New Art Gallery: 12 Favorite Kitchens with Paintings on Display.)
&#8\2\20;after clearly looking at too many beautiful modern parisian hotels 20
Above: “After clearly looking at too many beautiful modern Parisian hotels and homes, I designed this guy,” says Jessica of her breakfast nook. “I wanted to utilize and maximize the space with a renter-friendly (minimal holes in walls) built-in instead of going for a table and chairs. This way, four people can eat at once here instead of two or maybe three.”
at a cost of about \$750, the nook was jessica&#8\2\17;s biggest splurge (t 21
Above: At a cost of about $750, the nook was Jessica’s biggest splurge (the Smeg was gifted). “I purchased 10 red oak stair treads—that’s where the bullnose edges came into play—that I then graciously passed over to my dad, along with my design plan. The brass bars are curtain rods and the back cushions I made with fabric, foam, wood, and a staple gun,” shares Jessica.
the view from the living room into the kitchen. jessica&#8\2\17;s father al 22
Above: The view from the living room into the kitchen. Jessica’s father also built this beautiful bench, which wraps around into the entry hall, from alder wood sourced from Austin Hardwoods and Hardware in Santa Ana. (You can see her living room makeover here.)

Before

a peek at the original kitchen. 23
Above: A peek at the original kitchen.

Head over to Emily Henderson’s blog today to read all about Jessica’s kitchen makeover. For more budget-minded kitchen rehabs, see:

For more spaces designed by Emily Henderson and her associates, see:

(Visited 937 times, 1 visits today)
You need to login or register to view and manage your bookmarks.

Have a Question or Comment About This Post?

Join the conversation

v5.0