Icon - Arrow LeftAn icon we use to indicate a rightwards action. Icon - Arrow RightAn icon we use to indicate a leftwards action. Icon - External LinkAn icon we use to indicate a button link is external. Icon - MessageThe icon we use to represent an email action. Icon - Down ChevronUsed to indicate a dropdown. Icon - CloseUsed to indicate a close action. Icon - Dropdown ArrowUsed to indicate a dropdown. Icon - Location PinUsed to showcase a location on a map. Icon - Zoom OutUsed to indicate a zoom out action on a map. Icon - Zoom InUsed to indicate a zoom in action on a map. Icon - SearchUsed to indicate a search action. Icon - EmailUsed to indicate an emai action. Icon - FacebookFacebooks brand mark for use in social sharing icons. flipboard Icon - InstagramInstagrams brand mark for use in social sharing icons. Icon - PinterestPinterests brand mark for use in social sharing icons. Icon - TwitterTwitters brand mark for use in social sharing icons. Icon - Check MarkA check mark for checkbox buttons.
You are reading

DIY: A Wall-Mounted Leather Knife Rack

Search

DIY: A Wall-Mounted Leather Knife Rack

February 26, 2019

I like to see how other people store their kitchen knives. It’s a detail I often zero in on when visiting a new kitchen or looking at photos of kitchens. Are the knives tucked away in a stealth in-drawer block? Or are they out in the open in a traditional countertop block, or suspended from a magnetic strip?

A while back, I spotted a knife storage solution that, after hours of online searching, I realized is entirely bespoke: a leather knife rack mounted to the side of a kitchen island. I had to have one, so I made my own. With a pliable piece of leather, it’s a pretty simple thing to create, and you can tailor each loop in the rack to fit your own needs—no advanced knife skills necessary.

Photography by Alexa Hotz for Remodelista.

DIY A WallMounted Leather Knife Rack portrait 4

Materials

  • Wood cut to the desired length. I used a 12-by-2-by-1-inch piece of poplar. Choose a soft wood if you plan to use pushpins.
  • Leather hide, at least 14 by 7 inches (enough to generously wrap the entire piece of wood)
  • A handful of pushpins or nails
  • Sandpaper
  • Scissors
  • A hammer
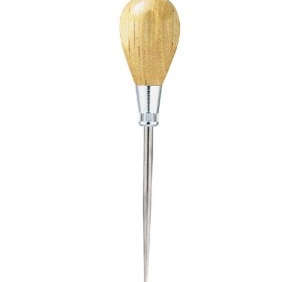
  • An awl; such as the General Tool 818 Scratch Awl; $4.33 from Amazon

Instructions

step \1: flip the leather over so that the inside of the hide faces up. sand yo 17
Step 1: Flip the leather over so that the inside of the hide faces up. Sand your pieces of wood, place atop the leather, and eyeball how you’ll wrap it. Measure, mark a pattern, and then cut to your liking.
step \2: on each end of the wooden block, trim the leather so that it can be wr 18
Step 2: On each end of the wooden block, trim the leather so that it can be wrapped tightly against the wood.

If your leather is on the thinner side, you can wrap the ends of the wood as you would a gift box, folding it over itself. If your leather is a thicker cut, as mine was, you’ll want to make L-shaped cutouts so that you don’t have unnecessary excess. If you’re using soft wood and leather, you can secure each section with a simple pushpin. If the wood is hard and the leather is thick, you’ll want to puncture your leather with an awl and use a nail to create a hole before applying a pushpin.

step 3: once you&#8\2\17;ve pinned down each end of the wood, fully wrap th 19
Step 3: Once you’ve pinned down each end of the wood, fully wrap the block overlapping the leather on the side that won’t show (and trimming as necessary). Secure the leather in place with a series of evenly spaced pushpins (I used three).
step 4: flip over the block to the display side. to create the knife holder, cu 20
Step 4: Flip over the block to the display side. To create the knife holder, cut a strip of leather that is about one-inch thick (or adjust as desired; leave extra length so that there’s room for error). Pin down one end of the strip in the center of the block about an inch from the end.
step 5: push the leather against itself until it makes a loop. secure the loop  21
Step 5: Push the leather against itself until it makes a loop. Secure the loop in place with a pushpin, and then continue making loops and pinning them down, adjusting each to your liking, until you’re an inch from the end.

Consider customizing your knife rack to your own set of knives and kitchen tools: I created one large loop to hold my kitchen scissors, and smaller, tighter loops for my knives.

step 6: to mount the finished rack on the wall, there are a variety of options: 22
Step 6: To mount the finished rack on the wall, there are a variety of options: You can hang it like a picture frame using a length of wire and pushpins on the back, you can nail the entire piece to the wall, or you can nail two sawtooth hangers on the back and hook them onto the wall (the approach I took).

The Finished Look

the knife rack hangs next to my stove for easy access to kitchen shears and par 23
Above: The knife rack hangs next to my stove for easy access to kitchen shears and paring knives. An alternative option is to nix the wooden block altogether and create an all-leather knife holster that hangs directly on the wall–something that I hope to try in my next apartment.

For more DIYs, see our DIY archive, plus:

N.B.: This post is an update. It originally ran on May 28, 2014, as part of our Modest Modern issue.

(Visited 317 times, 1 visits today)
You need to login or register to view and manage your bookmarks.

Product summary  

Have a Question or Comment About This Post?

Join the conversation

v5.0