As a New Englander and historic house buff, I’ve spent a good deal of time in colonial-era houses that have been lovingly restored in period style. One of my favorite subleties about these dwellings? The chalky texture of their limewashed walls.
I’ve always longed to create the same soft depth in my own home. Unfortunately, limewash, in this country at least, was a victim of progress: Commercial paints and easy-to-install drywall soon replaced this handmade pigment as well as the plaster to which it was applied.
So I was delighted by Janet’s recent post announcing that limewash has entered the modern age. Thanks to new, premixed formulas, it’s now possible to apply limewash to virtually any primed surface, even to drywall. But can an amateur do it?
As Remodelista’s resident wall-treatment tester—see DIY: An Economic Wallpaper Alternative and DIY: Stenciled Kid’s Room, Boreal Forest Edition—I decided to find out. The good news: It was totally easy.
Photography by Justine Hand for Remodelista, unless otherwise noted.

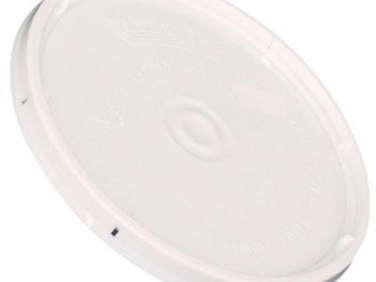
Above: Limewash powder. Photograph via Kalklitir.
Limewash is created when limestone or calcium carbonate is crushed and burned, then mixed with water and natural pigments. It was traditionally applied to plaster, stone, cement, and stucco. These days, it’s also mixed with an adhesive, so it can stick to nonporous contemporary materials. It’s nontoxic, antibacterial, and mold resistant. The only drawback is that you can’t clean it—instead, a fresh coat needs to be applied. (In colonial houses, with constantly burning hearths, this ritual was repeated twice a year. I guess I forgive my ancestors for embracing the more long-lasting effects of modern paint.)
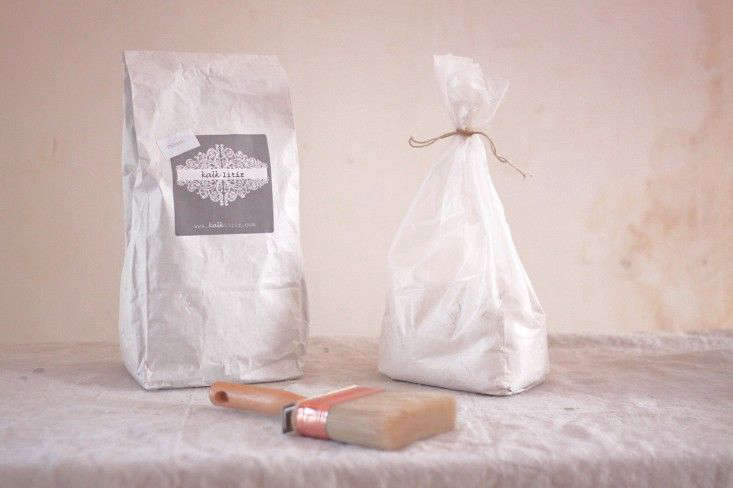
Above: Imported from Sweden (where limewash never went out of style), Kalklitir limewash is available at online shop Komedal Road.
Materials
- Limewash specifically formulated for walls. I used Kalklitir’s limewash powder in Palladio and Ivory, available at Komedal Road; $68 for a one-kilo bag, which, when mixed with 1.7 liters tap water, makes two liters of paint.
- Acrylic primer (optional, see Step 2 below). Since limewash is nontoxic itself, I chose a low-VOC primer to go with it.
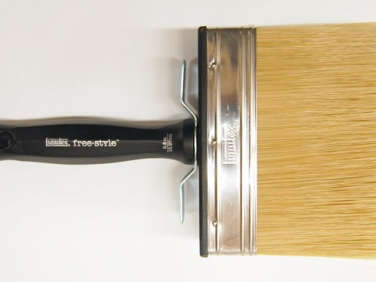
- Limewash brush. Mine came with my paint from Komedal Road, but you can also buy a similar Liquitex Freestyle Giant Block Brush at McCollum Interiors for $56.
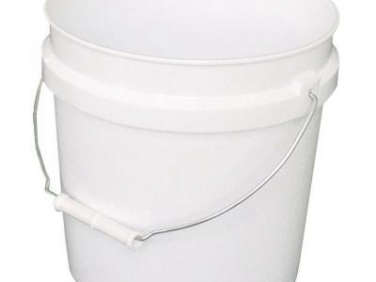
- White plastic paint bucket with lid. Available for $3.85 for a two-gallon bucket; $2.18 for the lid at Home Depot.
- Mixer or whisk
- Paintbrush, roller, and paint pan (for the primer)
- Safety goggles and gloves
- Drop cloth
Instructions

Step 1: Prep your walls as you would any paint job, by spackling holes and washing the surface. We had to strip old wallpaper.

Step 2: If you are working with a nonporous, previously painted, or water repellant surface, you need to apply a 100 percent acrylic primer as an undercoat to the limewash.* This base coat will ensure that no imperfections show through the limewash and will help the wash adhere to your wall. Allow this to dry thoroughly.
* N.B. Note that an acrylic primer will compromise the breathability of stucco, stone, brick, or old plaster, so you may not want to apply it to these.

Step 3: To mix your limewash, add 1.7 liters of tap water to your paint bucket. Gradually add the limewash powder a bit at a time, stirring to dissolve fully before adding more powder. After all the limewash powder is added, let sit for 10 minutes, stirring occasionally until powder is fully dissolved and there are no lumps. You should now have two liters of paint.

Above: Limewash must be applied with a brush not a roller. If I just lost you there, let me say that this is not akin to applying a whole wall of paint with a brush. Limewash is so watery that the process is actually about as fast as applying paint with a roller.
And because of its consistency, limewash will drip or run if you get too much paint on the brush, so only dip the tip of the bristles in the paint. Scrape off excess liquid on the sides of your bucket.
Note: Limewash can splatter and get on your hands as you continue to mix it. Though it’s nontoxic, it’s an irritant, so I recommend wearing safety glasses and gloves.

Step 4: Limewash can by applied with an X stoke or in a more traditional manner with overlapping perpendicular (up and down) brushstrokes. Both are really easy, but I prefer the X stroke (above in ivory), because it creates a more interesting texture when viewed close up, and overall gives the wall a more cloudy effect. (See Kalklitir’s website for videos of the two application methods.)
Making an X stroke: First edge around the side, bottom, and top of your wall. Fortunately, since limewash is so liquid, edging is very simple. I didn’t even tape off my trim! Then, starting at the top (or bottom) of the wall, paint three or four strokes on a diagonal, then flip your brush over and go over these strokes in the opposite direction to make an X. Continue working up or down until you reach the lower (or upper) edge, before moving sideways. Note that the working edge should always be wet, so leave enough time to complete at least one entire wall. And remember to continue to stir the paint in the bucket every so often. If you don’t, your pigment will settle to the bottom and your application will be uneven.
Allow your limewashed walls to dry thoroughly for two to eight hours, depending on the humidity of the room.

Above: Here’s my Palladio wall after applying the first coat. You’ll note the area to the left is already starting to dry. You may also notice that my application doesn’t look particularly neat. That’s okay.
Above: Here’s that first coat dried. See how my messy application has taken on a nice textured patina?

Step 5: Apply the second coat in the same manner as the first. (Notice how much darker the wet coat is? Limewash is up to 10 times darker went wet.)

Cleaning up and storage: Because limewash is water based and environmentally friendly, you can simply wash your brush with water to clean it. Once mixed with water, limewash paint can be stored in an air-tight container for up to a year. Dry limewash powder can be stored indefinitely.
The Finished Look

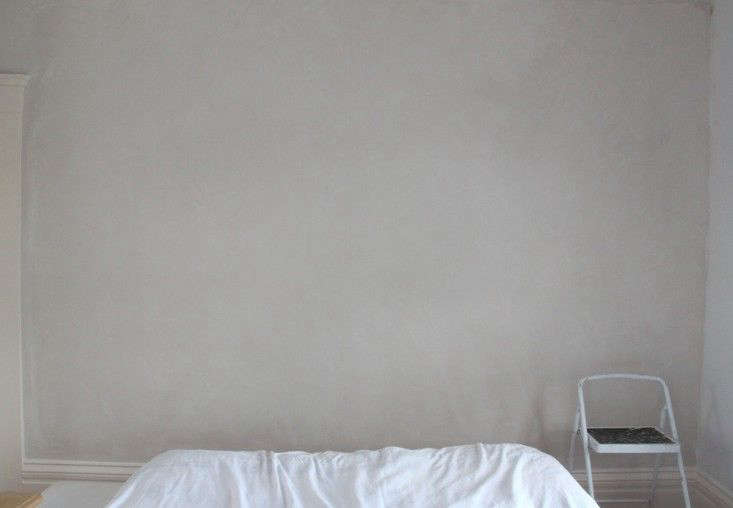
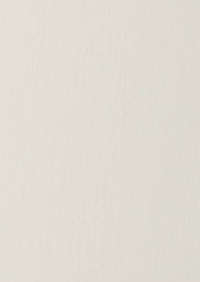
Above: Here’s my bedroom in Kalklitir Ivory paired with Benjamin Moore Sea Salt on the trim. It’s very subtle, but if you look closely, you can discern a slight modulation on the walls. Up close, it has a soft chalky texture that is so much more lively than matte paint. When I showed it to my mother, she observed, “Oohhh. It looks like old plaster…but more modern.” (Yes!)

Above: The texture of the limewash is more visible in this detail of the Palladio in the guest bedroom. (I still need more furniture in this room, but for now, this warm hue looks lovely paired with my pink Ikea sheets.)
Want to explore more old-fashioned finishes with a contemporary flare? See:
- Instant Patina: Annie Sloan Chalk Paint
- Paints and Palettes: Sydney Harbour Paint Company (milk paint)
- 5 Boutique Paint Lines From Down Under
N.B: This post is an update, the original story ran on March 20, 2015.


Have a Question or Comment About This Post?
Join the conversation