Black beeswax candles are a Remodelista favorite all year round. (Yes, we even use them for summer dinner parties.) But at $10 or more a pair, indulging our noirish habit can get a little costly. So we wondered: How hard would it be to make them ourselves? I decided to give it a try. Here are the results, the instructions, and the final word: Was it worth the effort?
Photography by Justine Hand for Remodelista.
Materials and Supplies

Here’s what you need:
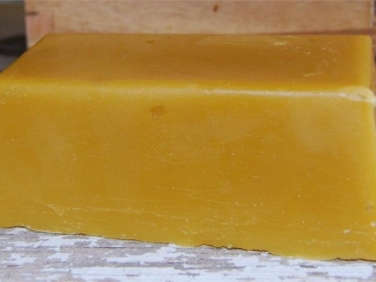
- Wax in an amount to fill your molds. I used Beeswax Bars from Ruhl Bee Supply; $9.95 per pound. I ordered two pounds to make 12 tapers.
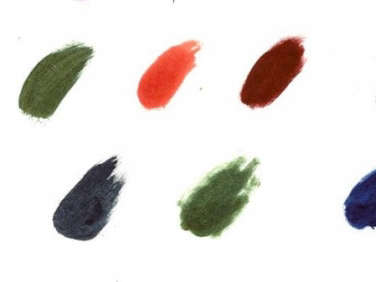
- Black candle dye. I used liquid eco-friendly candle dye, also from Ruhl, which is no longer available; Liquid Dye from Candlewic.com is another good option; starting from $3.75.
- A double boiler. For an enamelware option similar to mine, try Etsy.
- A taper mold. I used an antique tin 12-taper mold procured on Etsy.
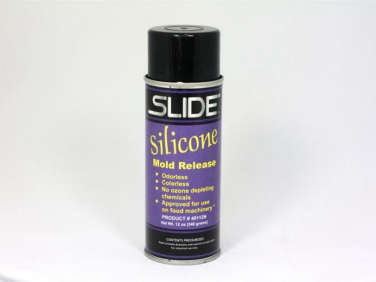
- Mold Release Spray, available at Ruhl Bee Supply; $10.95.
- Candle wick. Michael’s offers 50 yards of Flat-Braid Wicking for $21.99.
- Several sticks. I used three bamboo shish kebab skewers leftover from summer; chopsticks or pencils also work.

Step 1:
For 12 tapers, place two pounds of beeswax in a double boiler and heat at medium until the wax is entirely melted. (Use 1.5 pounds of wax for eight tapers, and so on.)

Step 2:
While the wax is melting, spray the inside of each opening with the mold release spray. Then turn your mold over and thread the wicks through the small holes in the bottom, leaving several inches of wick sticking out at both ends.

Step 3:
Tie knots to secure the wicks. Seal each opening with plumber’s putty or something like it—I used my kids’ Play-Doh.

Step 4:
Turn the mold back over. Form a loose knot just above each opening. Thread one stick through all the knots in each row. Keeping each wick in the center of its opening, pull and tighten until it’s taut. Repeat with each row.

Step 5:
When the wax is melted, reduce heat to low and gradually add color to get the shade you’re after.

Step 6:
Dip an extra piece of wick in the wax a few times to test the color–you want to make sure you’ve achieved at least a nice aubergine. To color two pounds of wax, I used about a quarter to a third of the small bottle and my candles were very dark.

Step 7:
Place the mold over newspaper in case any wax spills. To test your seals, carefully pour a little bit of wax into the bottom of each taper and let cool for a minute. Once no wax comes out the bottom, slowly pour the wax into the mold, overfilling each opening slightly because the wax will settle a bit as it cools. If necessary, you can top off the candles with a bit more wax.

Step 8:
Allow your tapers to set by leaving them out for 8 to 12 hours* or by placing the mold in an ice bath (which is supposed to give the candles a glossier finish). Once the wax has hardened, turn your mold over and cut or untie the knots at the bottom. At this point, according to some tutorials, your candles should “just slide out of the mold.” Mine did not. So I put them in freezer for 10 minutes as suggested. Still nothing. Then I tried running the mold under hot water. Nope. So, finally, I followed the boiling-water method of yet another candlemaker…
*N.B.: In a later attempt, I left the candles in the mold to cool for 24 hours, then placed them in the freezer for 15 minutes. They came right out, thus eliminating the need for the daunting boiling water dip below. Phew!

Step 9:
Using boiling water to extract tapers is tricky: You have to work quickly and it’s messy. (Don’t wear your best oven mitts.) First, find a pot that’s larger than your mold, fill it with water, and bring to a boil. While the water is heating, place newspaper or parchment in a cookie tray that has sides (to catch the dripping wax–I learned this the hard way.) Position the tray as near as possible to your pot. Using gloves to protect your hands, submerge the entire mold in the boiling water for 20 seconds.

Step 10:
Quickly remove mold from water to the cookie sheet and pull each row of tapers free. It may be necessary, as I discovered, to redip—but it works.

Step 11:
Cut the candles from the sticks and trim the wicks.
N.B.: If you kitchen is now filled with black splatters, the best way to clean up is by pouring boiling water over the spills and quickly wiping the wax away.
The Finished Look

Is it worth it?
So let’s review the cost of materials and labor—and see whether the project was worth it.
Prepping the wax was easy. I did it while making spaghetti sauce on the next burner. Ditto threading the wicks in the mold; that took about 10-15 minutes. The supplies came to around $35. My antique 12-candle mold was $60. (An eight candle mold is available at Better Bee for $47.33.) That’s $95 for 12 tapers, which is about $16 a pair—so far, I’m not ahead.
But after the initial outlay, things get better. The wick makes about 50 candles and there’s enough dye for around three to four dozen. So next time I make candles, I’ll really only have to invest in wax. At $9.95 per pound (x2), that’s less than $3 dollars per pair. Presuming it gets easier each time, I’d say that’s well worth the effort! (Guess what I’m giving the rest of the Remodelista team this holiday?)
Looking to accessorize your black candles? See 10 Favorites Modern Chambersticks for Making Your Way in the Dark. And if you’d still rather buy your candles, take a look at:
- Going Goth: 10 Sculptural Black Candles
- Sculptural Beeswax Candles from a Brooklyn Potter
- Object of Desire: A Self-Extinguishing Candlestick from Hay
N.B.: This post has been updated; the original story ran on November 3, 2014.


Have a Question or Comment About This Post?
Join the conversation