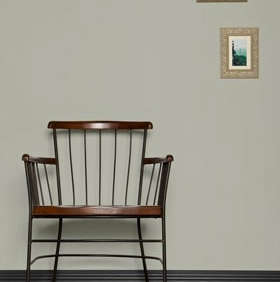
Last December I painted my bathroom black. I had always wanted to paint a room black and I’m not afraid to try something new to see how it looks. But I’ll say this: I got it out of my system. For my bathroom, it was just too dark.
Don’t get me wrong: I love a black bathroom, but I realize now that a black bath needs size or natural light–or both. (For examples of black bathrooms I envy, see Dark Water: 10 Modern Black Bathtubs.) The bathroom in my rental apartment has neither elbow room nor natural light, and my choice of the blackest black (Behr’s Broadway) was not working.
But how does one go about painting a room from black to white to pale gray? It’s about as easy as it sounds (it’s hard). See where I started in Steal This Look: The Bath in Black, and read on for the enlightening details.
Photography by Meredith Swinehart, except where noted.
After

Above: My newly bright bathroom is now painted in Farrow & Ball’s Lamp Room Gray. I kept the cabinets and trim the same white I had chosen when I painted the room black: Behr’s Polar Bear. I painted unfinished wood candlesticks in the same shade and lined them up on top of the medicine cabinet. My light is a hardware store porcelain socket (learn about its history and where to find the nicest versions in Object Lessons).

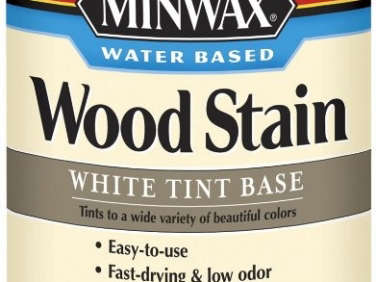
Above: I had to make some decor changes in my newly not-black bathroom: I swapped my black wastebasket for a Perry Dark Basket (on sale for $14.99 at Pottery Barn) and whitewashed the formerly unfinished wood floor register in Minwax White Wash Pickling Stain ($22.76 from Amazon). I also added a white bath mat to further brighten the space; the Isaac Floral Sculpted Bath Rug is $32.50 at Pottery Barn. I left my Muji cotton shower curtain unchanged; it’s been my favorite detail in the room from the moment I put it in.

Above: I kept a black pendant light overhead (see it in Steal This Look: The Bath in Black), and after I vanquished all the black in the room, I wanted one more dark element to relate to the lamp. I picked up a print of “A Party at Murano,” a painting by Eugene de Blaas for $10 at a local antiques store and put it in an old wood frame from my grandmother’s basement that I painted in Farrow & Ball’s Off-Black. It hangs over the toilet.

Above: In the formerly useless space above the rear cabinet, a stainless steel wire basket now holds toilet paper.

Above: I’m still in love with the nautical cleats that I installed as towel hooks in my last bathroom redo. For sourcing information, see Nautical Hardware: 7 Cleats for Home Use.

Above: I hung a small shelf above the toilet using a four-inch-wide piece of pine that I had cut to size at Home Depot. I whitewashed it with the same pickling stain that I used on the floor register, and decorated it with a few light-catching objects, including a small jewelry display box from Loved to Death on Haight Street in San Francisco.
Before

Above: The bathroom in black; see more in Steal This Look: The Bath in Black. Photograph by Liesa Johannssen for Remodelista.
The Process

Above: I’d heard–from my mom–that the way to paint from black to white is by introducing a battleship gray in between. I used Vulcan from Dunn-Edwards, a medium gray-blue that I happened to have on hand. (See Expert Advice: Architects’ Top 10 Gray Paint Picks for other recommended grays.)

Above: The battleship gray was already a dramatic change from the black–so much lighter!–but was still too dark. With only one of the room’s two lights on, shown here, Vulcan looked almost like black.

Above: The biggest obstacle to choosing the perfect paint color for my bath is the pink and gray marble tile surrounding the tub and shower. It’s not de facto ugly–I could see the tile looking beautiful in the right setting–but my bathroom is not the right setting.
I painted swatches of some contenders on the wall. On the top, left to right, is Benjamin Moore Linen White, Farrow & Ball Slipper Satin, and Farrow & Ball Lamp Room Gray. On the second row is Benjamin Moore White Heron. I learned from this exercise that I would need to use a primer before painting my final choice. All of my swatches are comprised of two coats–and none succeeded in covering the Vulcan gray paint.

Above: To get a better idea of how a paint color might look all around the room, I painted small canvases in a few picks. Shown here is Farrow & Ball’s Lamp Room Gray, my final choice–it was the one color that gave me hope for complementing the pink marble tile.

Above: For primer I decided to be economical and go with the white paint I had on hand. This happened to be Behr’s Polar Bear, the same color I used on the cabinets and trim back in December. So no straight lines required.

Above: Once the Polar Bear had dried, I was very happy about two things. First was my decision to prime the walls yet again before painting my final color, because the suggested black-gray-white method wouldn’t have worked. The white absolutely failed to cover the medium gray.
Second, my suspicion was confirmed that a bright white paint would have looked terrible in the room. Though bright white is ideal for making the most of a small space, pure white walls make my pink tile and cream-colored bathtub–the two things that I don’t want to stand out–stand out.

Above: Black still has a place in my bathroom–just not painted on the walls.
Browse more before and afters in Makeshift Society in Brooklyn, Scandi Whitewashed Floors, and Rehab Diary: Cobble Hill Kitchen Makeover. And see astonishing garden Before and Afters on Gardenista.
Finally, get more ideas on how to evaluate and choose the hardware items for your bathroom in our Remodeling 101 Guide: Bath Hardware.
Frequently asked questions
What is the article about?
The article is about repainting a black room in a light color and shows before and after pictures of the process.
What are the steps involved in repainting a black room in a light color?
The steps involved are cleaning the walls, sanding, priming, and then painting with a lighter color.
What kind of paint should I use to cover a black wall?
You should use a high-quality, thick paint that has good coverage and is designed specifically for repainting dark colors.
Do I need to strip the old paint before repainting?
No, you don't need to strip the old paint if it's in good condition. However, you should sand it lightly to ensure the new paint will adhere properly.
What tools do I need to repaint a room?
You will need a paint roller, paintbrushes, paint tray, primer, sandpaper, drop cloths, and a cleaning solution for washing the walls.
Should I hire a professional to repaint my room?
It depends on your skill level and comfort with painting. Repainting a room is a manageable task for most homeowners, but if you feel uncertain about your abilities, it's best to hire a professional.


Have a Question or Comment About This Post?
Join the conversation