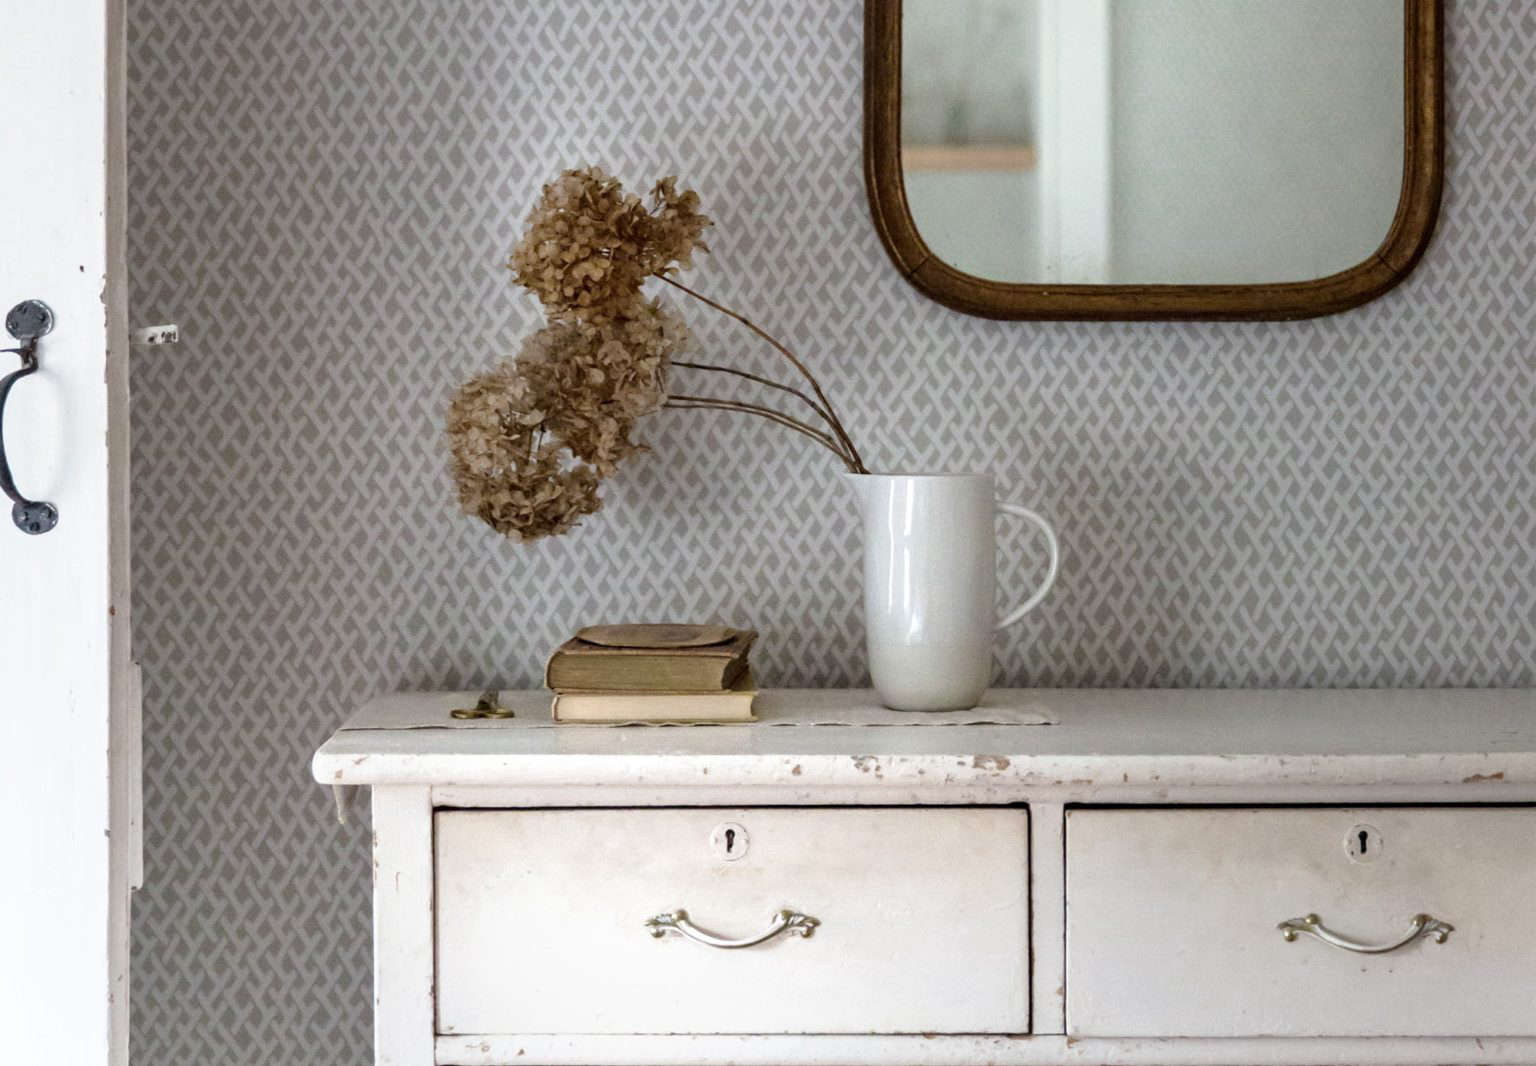
Whether you’ve snagged a great find at Brimfield—or just have a bureau sitting around that needs an update—painting is a great and cost-effective way of giving furniture new life. (See Rehab Diary: How to Paint Furniture Like an Expert.)
But maybe you don’t want it to look too new and shiny: You prefer a distressed look, or want to change the paint on an antique while respecting its character. Take your painting technique to the next level with these five DIY finishing hacks, courtesy of Jeremy Harnish of Orange County, California-based Craftsman Finishes.

1. Distress with Sandpaper
The simplest way of making a freshly painted piece look not freshly painted? Take some sandpaper to it.
What you’ll need:
Sandpaper and a sealer (wax or clear coat).
How to distress with sandpaper:
“If you are using pre-finished wood, it is best to sand and prime the surface first,” Harnish says. “Coat your wood with paint. You can use chalk paint, lime paint, milk paint, etc.; just make sure it has a flat sheen. Give the paint a light scuff with sandpaper and then use sandpaper on the edges and randomly across the surface so that the wood underneath the paint is showing. If you have panels [such as on the doors of a cabinet], sand the edges of the raised panel as well for more distressing. Use a clear sealer or clear wax in high traffic or moisture areas, like on kitchen cabinets and in the bathroom.”

2. Weather Wood with Vinegar and Steel Wool
An instant hack for that weathered gray look.
What you’ll need:
Steel wool and vinegar.
How to weather wood:
“This finish works flawlessly on raw wood,” Harnish says. “The only way to make pre-finished wood work is to thoroughly sand using an electric sander, and then results may vary.” (N.B.: Food blogger Eva Kosmas Flores warns against using this technique on golden oak: When she tried it on the flooring in her Portland, Oregon, remodel, the floors turned navy blue. Read more at A Food Blogger’s Rustic DIY Renovation in Portland, OR, Dark and Moody Edition.)
For untreated (or well-sanded) wood: “Add a piece of steel wool into a gallon of vinegar and let it soak for an hour. Then, coat your piece of wood [using the vinegar mixture]. Start with one coat and let dry, and then darken it with more mixture as you desire. Keep in mind that it dries lighter, so make sure to let each coat dry to see how much weathering you want to achieve.”

3. Paint Over Wax for a Faded Look
Leave some swaths and spots unpainted by using wax.
What you’ll need:
Two colors of flat paint and non-synthetic wax.
How to use wax to create a faded finish:
“Choose the two colors of paint wisely for the contrast you desire,” Harnish says, and choose the order: the bottom layer will show through in splotches. “Paint the first coat [with the first, underlying color] and let the coat dry. Then, dab on the wax in random areas. If the wax is really hard you can use a blow dryer to soften it up. Where you dab the wax, the base coat color will come through. Paint the top layer of paint [with the second color]. Let the coat dry, then rub off the waxed areas with cheesecloth or a rag. Seal the finish with wax or a clear coat,” particularly if the piece will live in a room with high moisture, such as a bathroom.

4. Create a Vintage Crackle Finish
The cracked look of old paint, thanks to coffee creamer.
What you’ll need:
Coffee creamer, water, and two colors of paint. (Many use glue to achieve a crackle finish, but Harnish advises coffee creamer for “better crackle, more manageability, and less mess.”)
How to create an antiqued crackle finish:
If you’re using pre-finished wood, sand and prime it before you begin. To create a natural crackle medium, Harnish says, “mix two parts coffee creamer to one part water. Then, paint one coat of paint onto the furniture and let dry. Brush the crackle medium mixture over the first layer of paint, and let that dry. Paint the top coat with a contrasting color to reveal the cracks in the paint.” As the top layer dries (Harnish suggests using a hair dryer set on “cool”), the top layer of paint will separate slightly, creating the crackled effect seen on old painted furniture.

5. Feign Patina with Milk Paint and Cheesecloth
An alternative to the too-perfect coat of paint.
What you’ll need:
Milk paint, a Scotch-Brite scouring pad, a spray bottle filled with water, and cheesecloth.
How to create patina:
For best results, Harnish advises using this technique on raw wood. First, paint the surface with one coat of watered-down milk paint and let it dry. “Then, sand the entire layer with a Scotch-Brite sanding pad. Next, use a spray bottle filled with water to wet the surface and use cheesecloth to wipe off. After it is wiped down, you can also add water to the cheesecloth and apply more pressure to the surface,” making sure to get into any crevices. The water, sanding pad, and cheese cloth will gently remove some of the milk paint, creating a faded, patinated effect.

6. Whitewash Old Wood
Ideal for craggy old wood with character.
What you’ll need:
Milk paint or lime paint.
How to whitewash reclaimed wood:
“This works best with wood that has character, not just plywood. An old piece of reclaimed barn wood is the ideal,” Harnish says. “Spritz the wood with water to make it damp, then apply the first coat of paint,” making sure the paint is watered down. “Then spritz it again in areas where you want the wood exposed more.” The paint will adhere lightly to the ridges in the wood, creating the illusion of old, rough paint. “You can apply more coats for a darker whitewash effect as desired,” Harnish says.
N.B. See Harnish’s video tutorials of these finishes here.
Painting a wall, cabinets, or piece of furniture? Refine your technique:
- Painting Kitchen Cabinets: 5 Tips from a Master Painter
- Expert Advice: 12 Essential Tips for the Perfect Paint Job
- DIY: New England Splatter-Painted Floors
Have a Question or Comment About This Post?
Join the conversation