Icon - Arrow LeftAn icon we use to indicate a rightwards action. Icon - Arrow RightAn icon we use to indicate a leftwards action. Icon - External LinkAn icon we use to indicate a button link is external. Icon - MessageThe icon we use to represent an email action. Icon - Down ChevronUsed to indicate a dropdown. Icon - CloseUsed to indicate a close action. Icon - Dropdown ArrowUsed to indicate a dropdown. Icon - Location PinUsed to showcase a location on a map. Icon - Zoom OutUsed to indicate a zoom out action on a map. Icon - Zoom InUsed to indicate a zoom in action on a map. Icon - SearchUsed to indicate a search action. Icon - EmailUsed to indicate an emai action. Icon - FacebookFacebooks brand mark for use in social sharing icons. flipboard Icon - InstagramInstagrams brand mark for use in social sharing icons. Icon - PinterestPinterests brand mark for use in social sharing icons. Icon - TwitterTwitters brand mark for use in social sharing icons. Icon - Check MarkA check mark for checkbox buttons.
You are reading

Expert Advice: How to Fold a Fitted Sheet, Step by Step

Search

Expert Advice: How to Fold a Fitted Sheet, Step by Step

January 4, 2019

No doubt about it, when it comes to domestic efficiencies the fitted sheet is a dream invention. Yet, too often it’s an absolutely nightmare to fold. All those elastic edges just refuse to be tamed. Fortunately, there is a way.

With the help of my husband, Chad, here’s how to properly fold a fitted sheet.

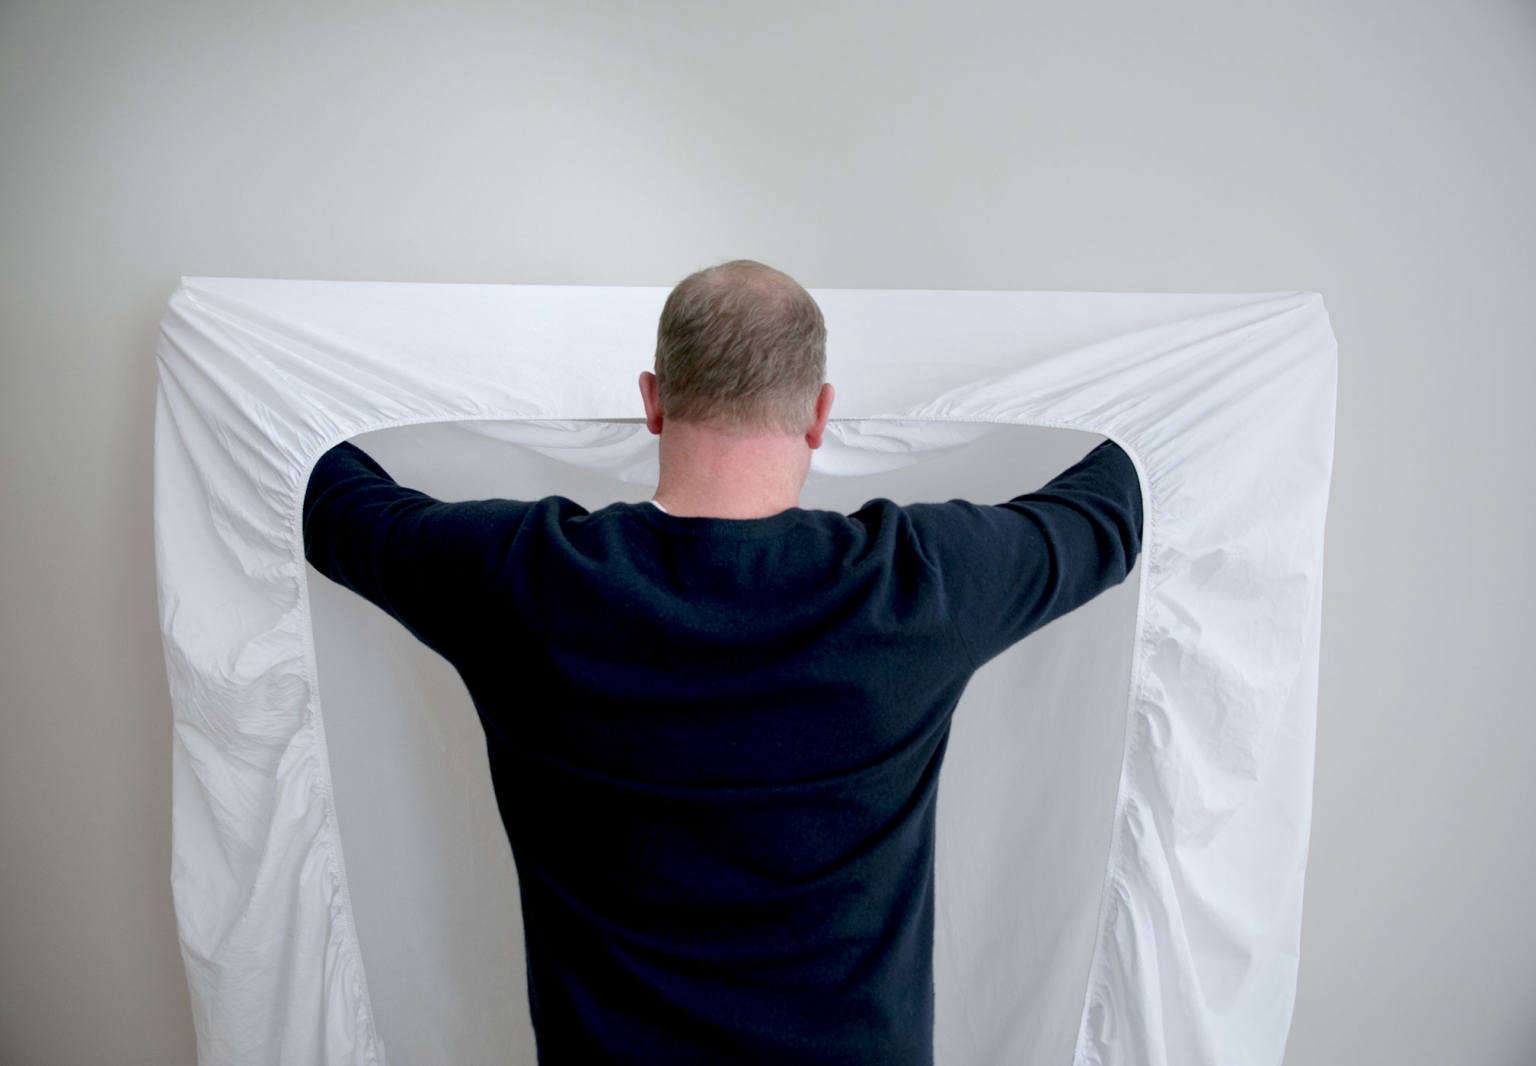
1. Hold the sheet with the elastic facing you.

 with the elastic side facing you, place your hands inside the top two cor 17
Above: With the elastic side facing you, place your hands inside the top two corner pockets of the sheet.

2. Turn one corner pocket inside out and slip the other corner pocket inside of it.

 turn the corner that&#8\2\17;s in your left hand inside out, bring th 18
Above: Turn the corner that’s in your left hand inside out, bring the ends together, and insert the right corner into the left pocket. Use your middle finger to make sure that the two corner points fit snuggly within each other. (Alternatively, you can fold the sheet in half. without turning the corner inside out, and then tuck one corner over the other.)

3. Run your hand from that doubled corner pocket to the next corner pockets.

keeping one hand inside the first corner pocket, run the other hand along the e 19
Above: Keeping one hand inside the first corner pocket, run the other hand along the elasticized seam until it reaches the next corner pockets, turning your sheet as you go, and tucking one corner pocket inside the other. The sheet should now be folded in half, with the corner pockets tucked into one another at the top of the sheet, one hand in each.

4. Tuck the remaining elastic corners into the final corner pocket.

with one hand in each doubled corner pocket, repeat step two: turn one of the d 20
Above: With one hand in each doubled corner pocket, repeat Step Two: Turn one of the doubled corner pockets inside out, fold the sheet in half again, and tuck this corner pocket into the corner pocket you’re holding in your other hand. Now all your elastic edges should be in one neatly tucked corner.

5. Lay the sheet on a flat surface.

 lay the sheet on a flat surface with the single corner pocket and elastic 21
Above: Lay the sheet on a flat surface with the single corner pocket and elastic edges folded over so that the sheet is square. Smooth the sheet. Having eliminated the awkward shape caused by the elastics, you may proceed to fold your sheet as you normally would.

6. Fold the fitted sheet lengthwise.

 using a neatly folded flat sheet as a size guide, fold the now square fit 22
Above: Using a neatly folded flat sheet as a size guide, fold the now-square fitted sheet lengthwise into thirds or quarters.
folded into thirds. 23
Above: Folded into thirds.

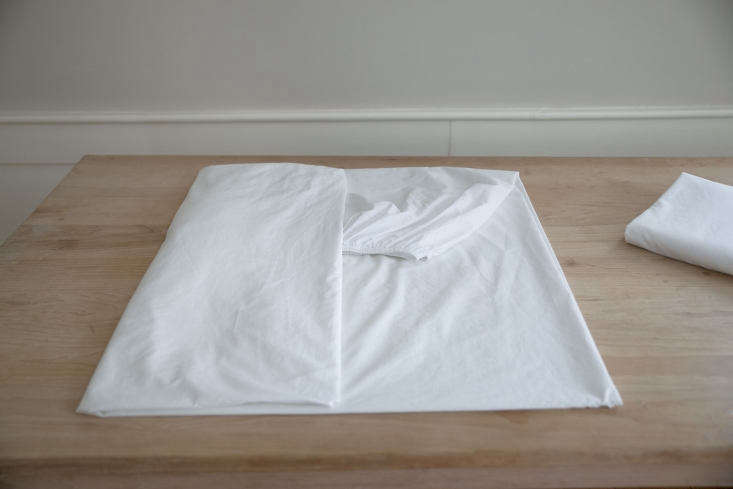
7. Fold the fitted sheet again.
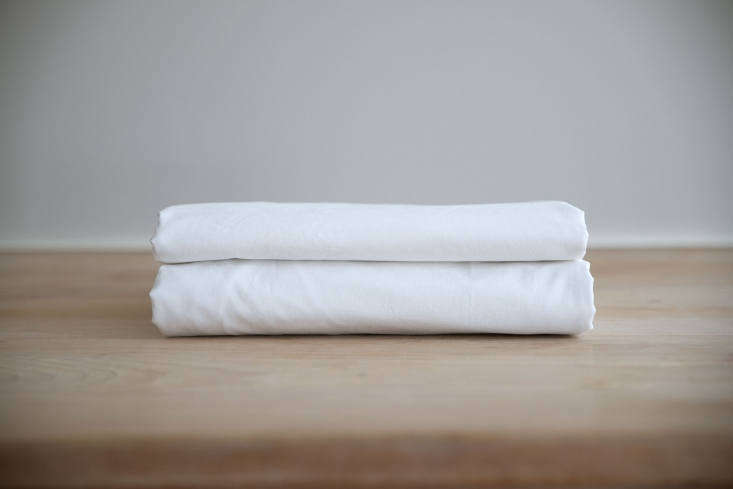
fold the sheet neatly along the length, perhaps using a folded flat sheet as a  24
Above: Fold the sheet neatly along the length, perhaps using a folded flat sheet as a guide so that they match sizewise.

Final Results

 properly folded, your fitted sheet should perfectly match your folded top 25
Above: Properly folded, your fitted sheet should perfectly match your folded top sheet.
 the finished product: properly folded fitted sheets are no longer an eyes 26
Above: The finished product: properly folded fitted sheets are no longer an eyesore in the linen closet.

Not long ago, we tackled another vexing bed-making problem: square (or hospital) corners. See our step-by-step in Expert Advice: Proper Bed-Making 101, How to Make Square Corners, Step by Step. And for linen logic and more advice to help you rest easier:

N.B.: This post is an update; it was originally published on March 16, 2018.

(Visited 1,969 times, 2 visits today)
You need to login or register to view and manage your bookmarks.

Have a Question or Comment About This Post?

Join the conversation

v5.0