We like this concept: oversized lanterns with rustic raw linen shades, spotted in an Italian interior designed by Orietta Marcon.
The Lampade Bigger by Vicenza-based Orietta Marcon of Oggetti measures about 20 to 24 inches in diameter and is made from hand-finished linen fabric. Interested in something similar as a DIY project? See our sources and instructions below for making a 20-inch-sized lamp.

Above: Marcon’s installation in an open stairwell. See more of her work at Designer Visit: Civico Quattro in Vicenze.

Above: The natural linen filters bright light from naked pendant bulbs.

Above: Imperfections are welcome; note the slightly lopsided hem.
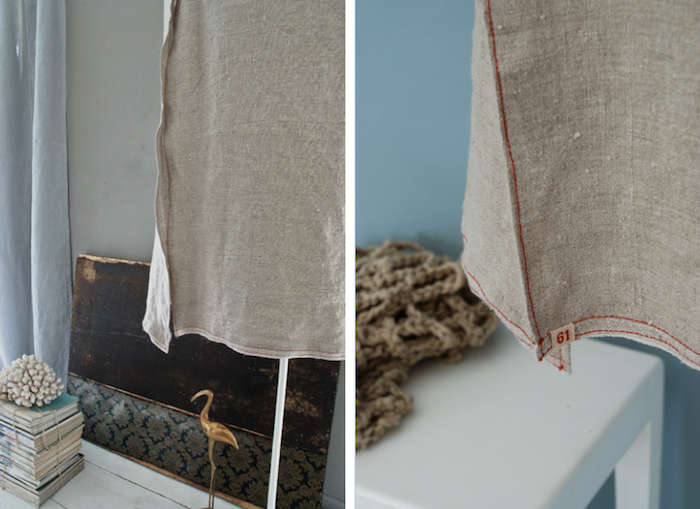
Above: Detail of the red hem on the Lampade Bigger shown with a painted iron base.
Here’s What You’ll Need:
- 60 inches of thick, silver wire: 16-Gauge Silver Plated Wire; $4.69 for 9.8 feet from Amazon.
- Wire cutters, pliers, strong tape.
- 2 yards of rough, organic linen sold by the yard: Linen Gifts’ Lithuanian Linen on Etsy ($19.49 for a 55-by 39-inch piece; you can also order custom lengths).
- A sturdy cotton thread like Gutermann Red Cotton Thread for $6.86 from Amazon.
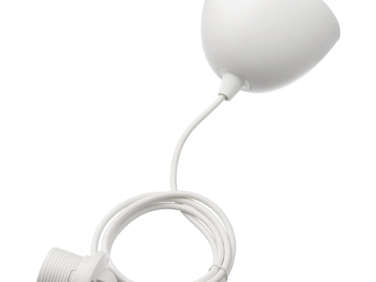
- A white or black Ikea Hemma Cord Set ($5 each) or the Khaki Houndstooth Extension Cord for $39 from Schoolhouse Electric.
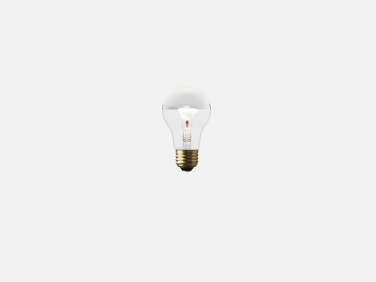
- A bulb such as Schoolhouse Electric’s A19 Silver Tip Bulb 60 Watt for $5.
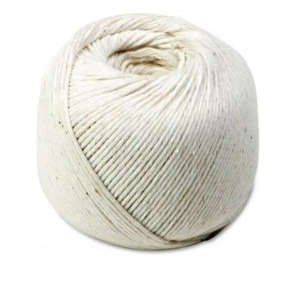
- At least 26 inches of cotton string: White Cotton 10-Ply Medium String for $4.99 from Amazon.
Instructions:
- Cut the length of wire to 60 inches, make a circle by overlapping the ends just a bit and taping them together (you can use electrical, floral, or duct tape for this).
- From your 2 yards of linen, you’ll need about 64 inches: 60 to 61 inches to cover the circumference, and 2 to 3 inches for a healthy seam allowance. Moving slowly around the wire, hand-stitch the fabric until the two ends meet up.
- Using a sewing machine and the red thread, sew the hem down the side (you can even go with a French seam if you’re savvy with sewing), leaving about an inch open at the bottom for a little movement. Then finish the bottom of your fabric with another red hem.
- Center your pendant cord (Ikea’s has instructions for proper centering) and tie your string from the cord through the diameter of the circle, attaching on both sides. Hang the cord from a ceiling hook or as desired.
For more DIY fabric light fixtures, go to Julie’s roundup of Camouflage for Unsightly Lights. Also don’t miss Izabella’s recent DIY: Pendant Lights Made From Drinking Straws (for Less Than $20).
N.B.: This post is an update; the original story ran on January 14, 2013 as part of our Roman Holiday issue.


Have a Question or Comment About This Post?
Join the conversation