I make an effort to buy as little “new” as possible, and I admit some things are hard to source used. But picture frames? They’re a dime a dozen at secondhand stores, and the old wooden ones are far more interesting than their plastic-wrapped counterparts, anyway.
The only caveat? Vintage frames are often missing protective glass and hardware on the back for hanging. But it’s easier than you think to get them wall ready:
Photography by Meredith Swinehart.
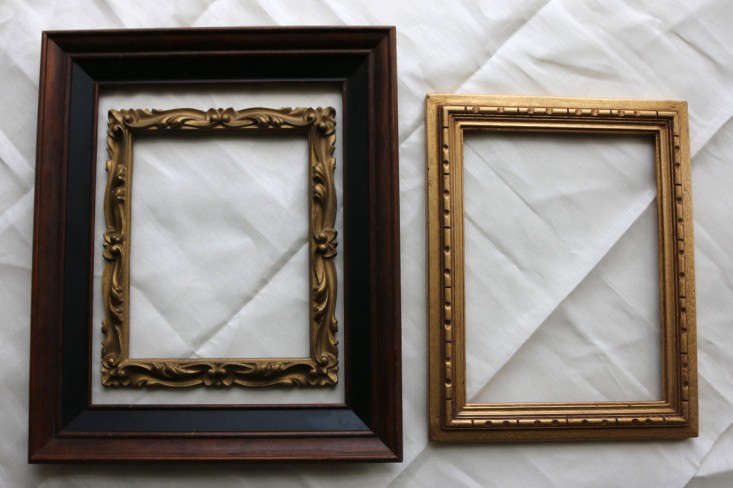
Above: I found two of these vintage frames in my grandmother’s basement; I bought the third at an antiques store in Seattle. All three have been collecting dust under my bed for the last several years because none had glass or a way to hang them.
A Note on Hardware Options

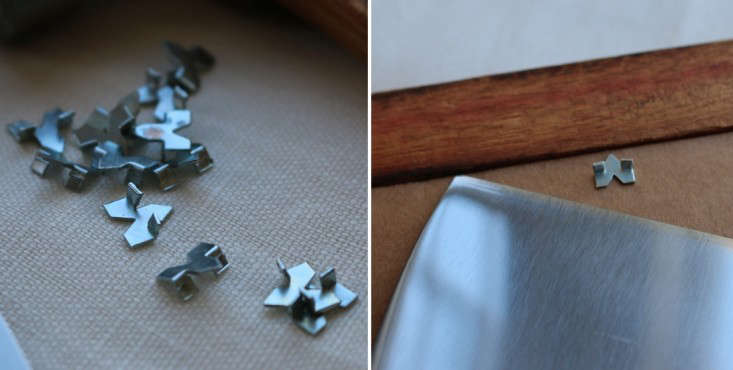
Above: Sawtooth hangers are the most common frame-hanging hardware available, and so they’re what most people use. They come in nail-free and nail-in versions, and my advice is to stay away from both: “Nail-free” sawtooth hangers are all but impossible to install unless you’re working with a very soft wood, and “nail-in” sawtooth hangers usually come with tiny pins made of a soft metal that will bend at the first thrust into your frame. Instead, I recommend using sturdy, screw-in hardware: screw eyes and D-ring hangers.

Above L: Screw eyes of various sizes–one at each side of a frame allows wire to be strung across the back. Above R: Small D-ring hangers. D rings allow a frame to hang flush against the wall.
Here’s what I used to make frames wall ready.
Materials
- Vintage picture frames.
- Artwork.
- Assorted Screw Eyes for flat-backed frames; $1.24 for a pack of 10 at Lowe’s.
- Small D-Ring Hangers for beveled frames; $2.58 for a pack of four at Lowe’s.
- Appropriately sized screws for your frame (often the screws that come with D-ring hangers are too long). (I bought #8 1/2-inch screws; $1.18 for a pack of 12 at Lowe’s.)
- Window glass, custom cut to size. (A 10-by-12-inch piece of 2.5 millimeter-thick window glass is $2.32 at Lowe’s.)
- A power drill with drill bits, or a nail and hammer for punching pilot holes.
- A power drill with screwdriver bits, or a screwdriver.
- Cardboard.
- A straight edge (for cutting cardboard).
- A craft knife (for cutting cardboard).
- Glazier Points; $1.30 for a 1-ounce box at Lowe’s.
- A metal putty knife or a flathead screwdriver.
- Picture Hanging Wire; $5.05 for 25 feet at Amazon.
- Wire cutters or heavy-duty scissors.
- Pliers (optional).
Instructions

Step 1: Decide whether you’ll hang your frame vertically or horizontally, and install screw eyes on the back of the frame accordingly. Install one on each side on the top half of the frame. (If you’ll be using hanging wire to hang your finished frame, the screws need not be perfectly aligned with each other, but try to get them close.) Here, I used the smallest screw eye on a frame made of fairly soft wood, and was able to twist it in with my hands.

I chose D-ring hardware for the beveled frame (the back is not flush against the wall–it meets at an angle), so that the ring lies flat against the wall when hung. Before securing the ring in place, I noticed that the screws that came with my D-ring set were too long for my frame, and if inserted, would have gone through the other side; I replaced them with a pack of #8 1/2-inch screws.
The beveled frame was made of much harder wood than the screw-eye frame; I used a drill to make small pilot holes in the frame before driving the #8 screws into it.

Plastic frames are far harder to work with than wood. With them I learned that the trick is to drill pilot holes first wherever you want to insert a screw or fixture. This helps lodge hardware firmly into the plastic.

Step 2: Have glass cut to the exact dimensions of each of your frames. If you’ve never had glass custom cut, it’s easier and cheaper than you might think. Many hardware stores will cut glass for you as will Lowe’s and The Home Depot–call in advance to be sure. Most will cut a few pieces for free and then charge a small fee for each cut after that.
I bought three 10-by-12-inch pieces of 2.5 millimeter-thick window glass for $2.32 each at Lowe’s, and the cuts were free. I carried the frames along me to make sure the glass fit–it’s smart to check; old frames often have wonky dimensions. When one piece of glass was slightly too big, my salesman at Lowe’s patiently stuck with the task, trimming each edge on an angle to make the piece work.
Word of warning: This is industrial-grade glass that has been freshly cut. The edges are sharp–I myself had a few serious near misses when cleaning the glass for insertion into the frames, and I have a shallow scratch on my palm as a reminder. Be careful when handling the glass.

Step 3: Find the art you want to frame. I have a folder of art prints my grandmother saved, some from museums and art books, others from calendars and ads.

Step 4: If you’re framing a print, photograph, or anything on paper, add a piece of cardboard to make the artwork fit snugly in the frame. For mine, I tore apart an Amazon delivery box and cut rectangles using a craft knife against a straight edge. (Avoid using scissors; they’ll work but will make a mess of the cardboard.) If you want to be archival, consider using acid-free cardboard.
Step 5: Install glazier points to make the artwork stay in the frame. Above L: Glazier points are small metal arrows that will hold your artwork in place. Above R: A metal putty knife is the best tool for securing the points in place.

Above L: Use the putty knife to push the tip of the glazier point into the side of the frame. Above R: A screwdriver is also useful for installing glazier points: use the screwdriver to push in each edge of the arrow, one at a time.

Stop pushing once the point is secure enough to hold your artwork. I like to leave mine somewhat loose so they’re easy to pull out with pliers when I want to swap out the artwork.

Step 7: Using wire cutters or heavy-duty scissors, cut a length of metal wire that is approximately 20 percent wider than the frame.

Step 8: Pinch the wire around the screw eye or D-ring. Using pliers (to be precise) or your fingers (my approach), wrap the wire around itself a few times to secure the hold, and cut off the excess wire. Gravity will make the wire taut; don’t leave too much room for hanging or your wire will show over the top of your frame.
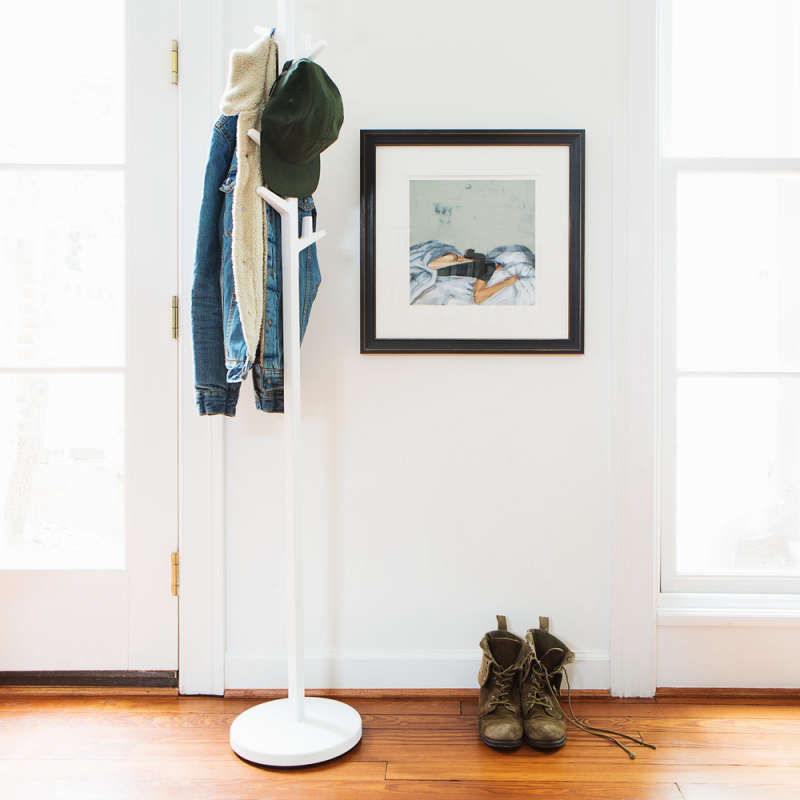
The Finished Project

Above: Some of my grandma’s art prints will finally see the light of day. Two are Van Gogh prints and the third is by Maurice Utrillo.
Looking for more DIY projects? Consider a DIY Watercolor Japanese Lantern and DIY Red Lacquer Table for Under $500; and, on Gardenista, DIY Hanging Planters.


Have a Question or Comment About This Post?
Join the conversation