Honestly, I never imagined I’d meet a God’s eye I liked. But recently, when trying to conjure a Christmas tree star for Gardenista (see A Star Is Born: DIY Foraged Tree Topper), I remembered the old camp craft, and I thought, maybe it’s not the object itself that lacks appeal–perhaps it’s just the rainbow yarn. And so the idea of the non-gaudy God’s eye was born.
Photography by Justine Hand for Remodelista.
Instructions

Above: I began with some red and black ribbon and white yarn, and then threw in a little glittery gold and silver string for extra holiday cheer.
Materials
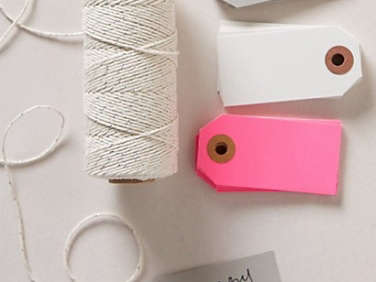
- Natural yarn, ribbon, or twine. I used a selection of Italian Cotton Ribbon and Wrapped Cotton from Studio Carta, as well as Twine from Anthropologie.
- Balsa wood or popsicle sticks. Balsa wood is readily available in strips at your local hardware or art supply store.
- Scissors
- Exacto knife, or other sharp utility knife
Making God’s-eyes is a bit like riding a bike. After a brief refresher, you’ll find you settle right back into the rhythm of it. Let’s start with the basics.
Ornament 1: The Simple God’s Eye

Step 1: Cut your balsa wood into two pieces of equal length.
Note: Although you can use popsicle sticks, I chose thinner widths of balsa wood, which seemed a better way to conjure the light snowflakes that I was going for.

Step 2: Place two pieces together to form an X. To secure, simply wrap your twine diagonally in each direction to create an X across the front. I do not tie my yarn to the sticks because it creates an unruly lump. Simply wrapping around in each direction several times is enough to secure the center of the God’s eye. Once it’s wrapped, I trim any lose ends.

Step 3: Wrap your twine once, back to front, around one stick.

Step 4: Bring your twine across the front to the next stick, wrap around the back and across the front to the next stick.

Step 5: Repeat: Wrap around, quarter turn across the front to the next stick, wrap around, and so on until you reach your desired width.

Above: Made with Studio Carta Wrapped Cotton String in red ($22 for 90 yards), my simple God’s eye is a festive ornament. I finished mine with a simple knot around the final stick and then created a long tail with a loop at the end for hanging the ornament.

Above: The back of the God’s eye is also lovely. Here is a step-by-step guide to making a classic God’s eye.
Ornament 2: The Multi-Textured God’s Eye

Above: To create this pattern, I wrapped the first two layers in the traditional manner, pulling the ribbon and then white mohair passing the yarn over each stick. For the final layer, instead of moving over, I passed under each stick. (You can also simply turn the God’s eye over and continuing working across the front of the opposite face if that’s easier for you.) To switch materials, simply tie one to the next with a knot and trim the tail. Once you begin experimenting with different patterns, you’ll find that the possibilities are endless.
Ornament 3: The Complex God’s Eye

Above: For a more elaborate design, start with four sticks crossed into a star form. (Note: I found that it’s easier to secure this many sticks if I notch them with my Exacto knife.) The techniques for making complex God’s eyes are the same as the simple, you’re just dealing with more quadrants. First, to secure the sticks, wrap a thread diagonally across from one quadrant to the opposite moving around the star. Then work your yarn around in eighths instead of quarters, wrapping it around each stick and across the front to the next one.

Above: You can create more intricate patterns using the complex God’s eye framework. Here I applied the basic technique in the center. For the outer pattern, I skipped a stick to create a square pattern. To do this, tie two pieces of string to two consecutive sticks. Wrap one once around in a square, tie off, and then use the other to go once around.

Above: You can also alternate the yarns that form the squares to create a radiating snowflake look. To do this, begin as you did above with two pieces of string tied to consecutive sticks. Work one string around the square, but don’t tie it off. Simply hold it taught, while you work the next string once around. Continue to alternate once around with each piece.
The Finished Look

Above: Hung on a bare branch, my God’s eyes conjure a simple Scandi Christmas.

Above: Smaller God’s eyes make great gift tags.
Want more Scandi-inspired holiday decor? See:
- DIY Holiday Candelabra
- DIY Video: Scandi-Inspired Holiday Wreath
- DIY: A David Stark–Designed Holiday Table


Have a Question or Comment About This Post?
Join the conversation