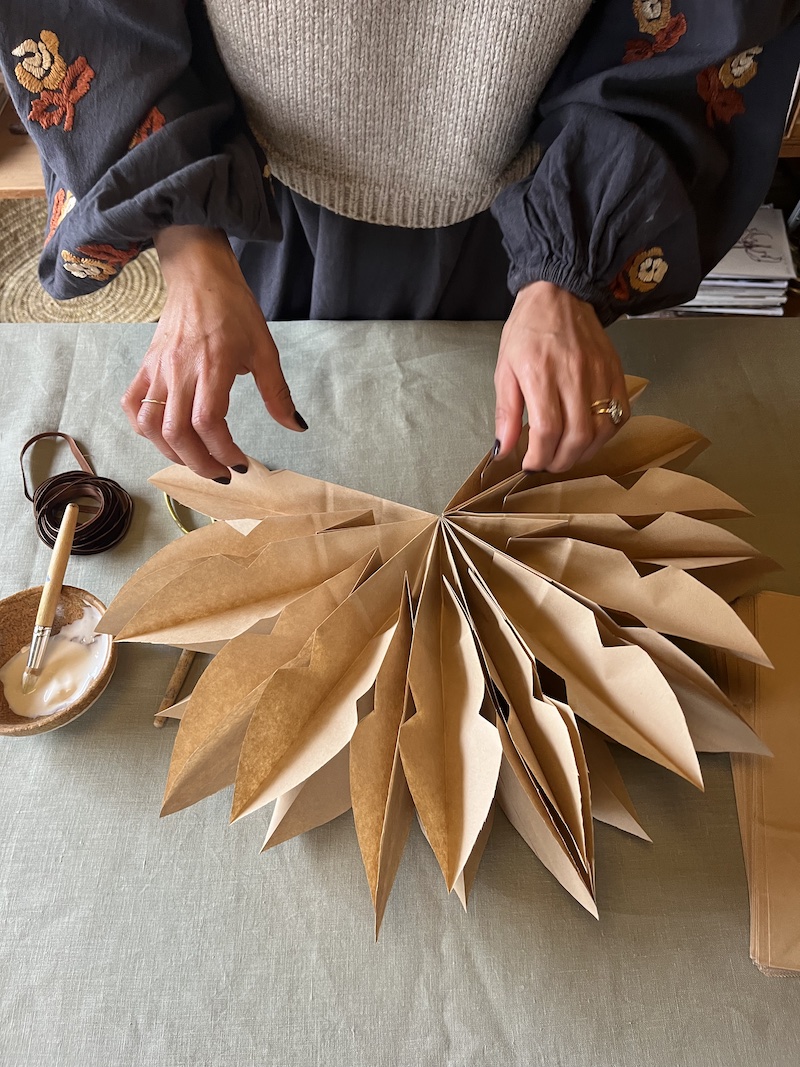
These brown paper bag stars are a simple holiday crafting activity that take the humble two-dimensional snowflake up a level. I first saw these a few years back at my friend Layla Zaa’s house. Layla is an interior designer and consultant with an eye for for sustainable styling ideas. At the time, she promised me a how-to for the holidays, so without further ado:

Materials

You will need:
- 9 brown paper bags
- Glue
- Ribbon or string
- Scissors
- Hole punch
Step 1:
Get your equipment together and select three paper bags. Apply glue to the bottom of the first paper bag and a vertical stripe of glue down the center of the bag.

Step 2:
Stick the second paper bag on top of the first, and repeat the glue until you have three paper bags stuck together. (Any more and the shape will become too thick to cut through.)
Step 3:
Sketch a shape for the arms of the stars. You can embellish the design with small nicks in the arms of the star, or keep it plain and simple. Cut out the shape.

Step 4:
Once you have cut through the shape, continue glueing three more bags on to your design. Using your shaped bags as a template, cut the next three bags out. Repeat with the remaining three bags until all nine bags are glued together and shaped.

Step 5:
Now, open your design to reveal your paper star shape.

Step 6:
Using a hole punch, make a hole through two points of the star. Thread with jute twine or thin velvet ribbon.

Step 7:
Tie two knots in the ribbon: one near the hole you’ve just made and another towards the end of your ribbon.

The Finished Look
Your star is ready to hang. If the joining folds of the star don’t sit flat together, you can secure them with a paper clip.

For more holiday DIYs, see:
- DIY: Oversized Festive Bows from the Thread Maker in London
- With Love From Japan: DIY Frozen Herbariums
- DIY: Mussell Shell Votives for Dark Autumn Nights
N.B.: This story originally appeared on December 19, 2023 and has been updated.

Have a Question or Comment About This Post?
Join the conversation