“Bows bring joy,” explains Zara Peters, founder of Thread Maker. “They just have this way of making everything feel festive and special.” We couldn’t agree more. And what we particularly love about these statement bows is that they are handmade to order and come in a beautiful range of understated, natural fabrics.
If you’d like to make your own, join us for a tutorial, courtesy of Zara, who took these photos.

Thread Maker began in 2020 with “a little lockdown wedding.” Zara—a life-long maker who started her first craft club at the age six—made an oversized hair bow clip for her friend’s big day. More commissions followed: some were massive, some were dainty: many were made from off-cuts of vintage fabrics Zara had sourced from antique markets and eBay. “The biggest I’ve made so far used five meters of linen,” Zara says. It was affixed to the back of a convertible vintage BMW: an alternative to the traditional “just married” string of tin cans.
This time last year, Zara’s bows morphed into festive decorations. “The idea is that these can be used year after year to adorn the top of your tree, your front door, or mantlepiece—anywhere in need of some festive cheer,” she explains.
Zara’s bows are available to purchase exclusively via Straw London—an expertly curated homeware and gift shop on Columbia Road. Alternatively, if you’re handy with a sewing machine, Zara has devised a method for creating a homemade version of her jumbo, cheer-bringing bows below.
Materials and supplies
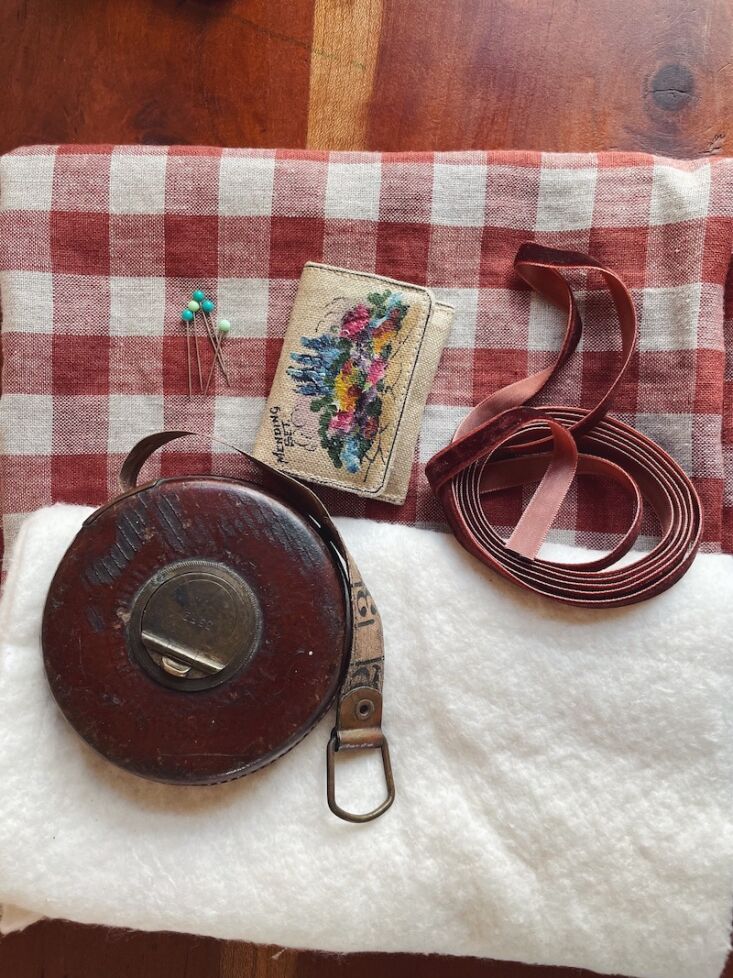
You will need:
- 1 meter of extra-wide linen
- A sewing machine
- An iron and scissors
- Needle and thread for hand finishing
- 1 meter of bamboo lining
- Luxury velvet ribbon
Step 1:
Iron your fabric and cut it into three pieces: one rectangle for the main body of the bow (18″ x 35″ or 45cm x 90cm); one rectangle for the tails (47″ x 16″ or 120cm x 40cm), and one small rectangle (6″ x 2″ or 15cm x 5cm) to sew around the middle of the bow. These measurements are approximates only: you can play around with sizing depending on what type of bow you’re after—subtle or showstopper.

Step 2:
Start with the main body of the bow. Fold the fabric in half lengthways and sew the edges together. This piece will be turned inside out, so make sure you sew the “right side” of the fabric together. (I always press the seams open with an iron after each stage, as this keeps the edges neat and tidy.)
Step 3:
Turn the fabric inside out so the “right side” is showing and insert the bamboo lining, which should be cut to the same dimensions as the main body of the bow. (The lining doesn’t need to be stitched in place, as it will hold its position once the bow is gathered together.)

Step 4:
With the lining in place, fold the main body of the bow in half again widthwise (“right sides” together) and sew the end together again. (Remember to press your seams again.) Turn the fabric inside out one last time and the main body of your bow is ready. Set aside.
Step 5:
Now you can tackle the tails. Fold the “right side” of the fabric in half lengthways and then again widthwise and trim both ends at a 45-degree angle. This gives the tails their elegant, tapered shape at the end.

Step 6:
Pin the seams together to hold in place and machine sew all around the edges leaving a small gap in the middle for turning right side out. Press the seams open and turn the tails “right side” out.

Step 7:
Now it’s time to assemble your bow. Bunch the bow and the tails together, making sure you measure the middle point of your tails carefully, or else your bow will be lopsided.
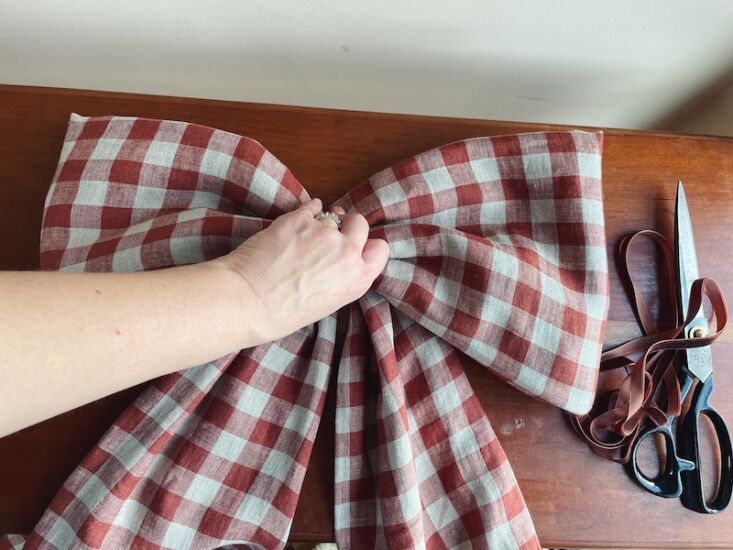
Step 8:
Gather everything evenly in the center and secure it by hand using a gather-stitch. Keep the end of the thread loose and long, so you can wrap the thread around the center, securing the structure of the bow.
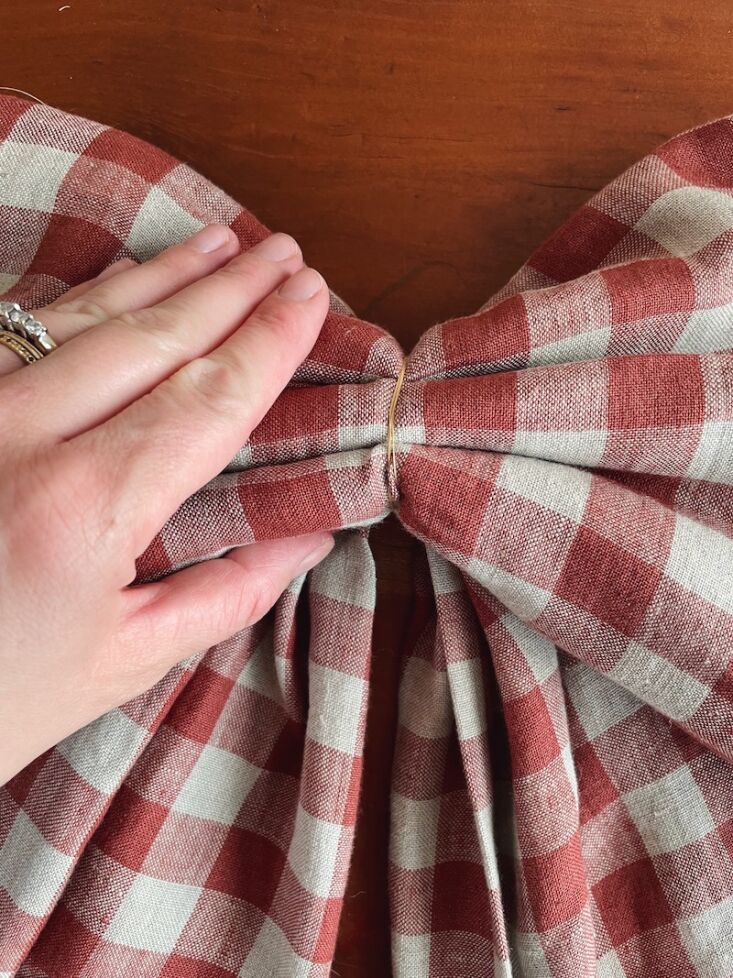
Step 9:
Finally, fold and press inwards the raw edges of your smallest piece of fabric so that you create a neat strip of fabric. Wrap this over the exposed threads in the center of your bow, tucking in any raw edges. You might need to add some extra stitches here to make sure everything is secure. Finally, tie a piece of velvet ribbon around this, so you can affix your bow to the top of tree or center of your wreath.

The Finished Look

More holiday DIYs:
- Instant Festivity: 11 Foraged and (Mostly) Free Decorating Ideas from the Editors
- DIY: Easy Ceramic Votive Holders for a Festive Table
- Last-Minute DIY: Holiday Garlands Made of Star Anise
N.B.: This story originally appeared on December 7, 2022 and has been updated with new links.

Have a Question or Comment About This Post?
Join the conversation