Icon - Arrow LeftAn icon we use to indicate a rightwards action. Icon - Arrow RightAn icon we use to indicate a leftwards action. Icon - External LinkAn icon we use to indicate a button link is external. Icon - MessageThe icon we use to represent an email action. Icon - Down ChevronUsed to indicate a dropdown. Icon - CloseUsed to indicate a close action. Icon - Dropdown ArrowUsed to indicate a dropdown. Icon - Location PinUsed to showcase a location on a map. Icon - Zoom OutUsed to indicate a zoom out action on a map. Icon - Zoom InUsed to indicate a zoom in action on a map. Icon - SearchUsed to indicate a search action. Icon - EmailUsed to indicate an emai action. Icon - FacebookFacebooks brand mark for use in social sharing icons. flipboard Icon - InstagramInstagrams brand mark for use in social sharing icons. Icon - PinterestPinterests brand mark for use in social sharing icons. Icon - TwitterTwitters brand mark for use in social sharing icons. Icon - Check MarkA check mark for checkbox buttons.
You are reading

DIY: Easy Ceramic Votive Holders for a Festive Table

Search

DIY: Easy Ceramic Votive Holders for a Festive Table

December 20, 2022

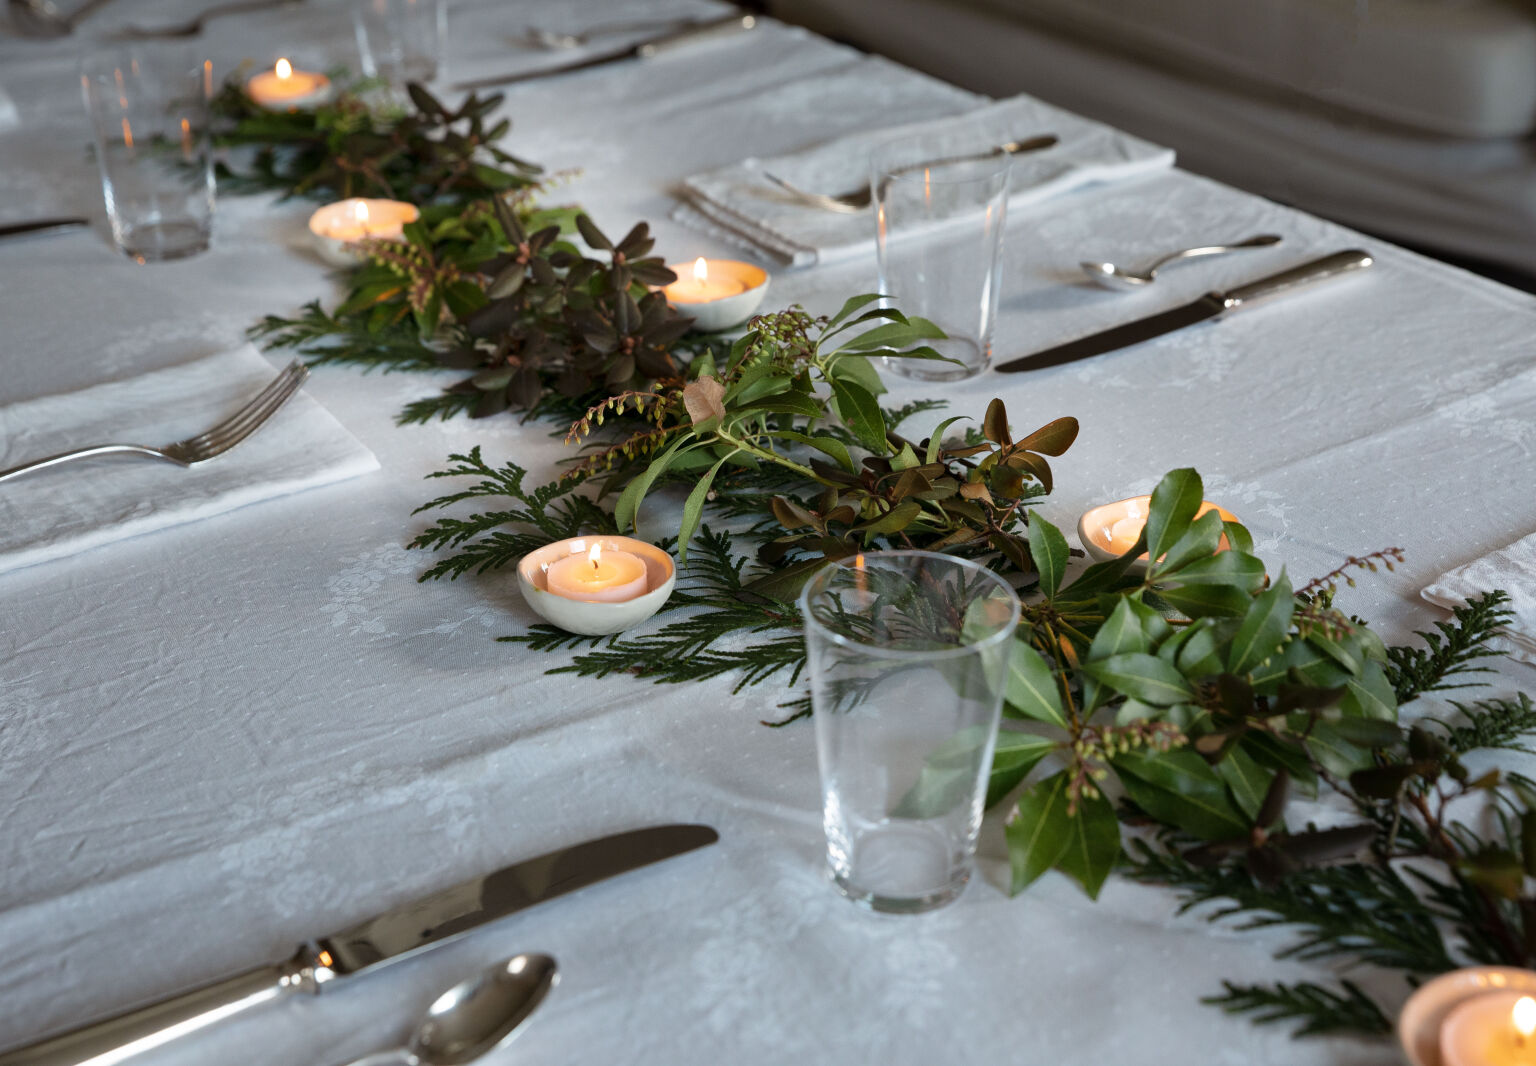
Finally, after years of admiring the many talented potters here, I enrolled in a pottery class for myself. I was surprised the find how simple it was to make some things (basic hand-built vessels) and how hard it was to make others (anything thrown on a wheel).

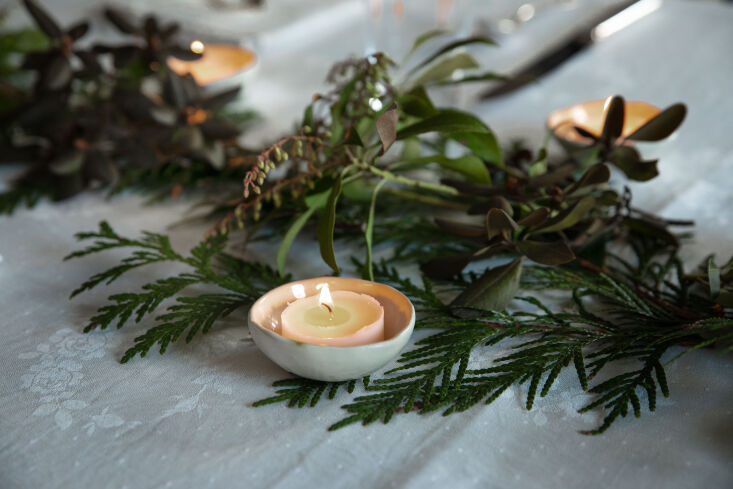
One of the easier objects to fashion? A rustic votive holder for the holiday table. Thanks to air-dry clay, you don’t even need a pottery studio to make them yourself. Just grab a few household items and follow these steps.

Photography by Justine Hand for Remodelista.

though potters use specially designed tools, you can make small votive holders  17
Above: Though potters use specially designed tools, you can make small votive holders with everyday household tools.

Supplies:

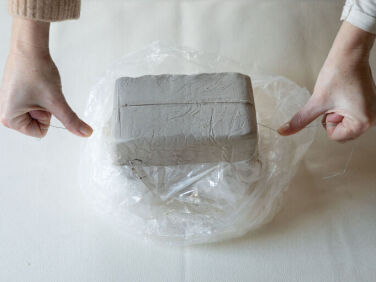
  • Air-dry modeling clay in white (I got mine on Amazon for $28).
  • A small bowl, or something similar, to serve as a mold. It must be large enough to hold a votive, but not too tight as the clay will shrink as it dries.
  • A 2-inch circular object (I used the top of a jelly jar)
  • Plastic wrap
  • A sharp pointed tool such as an awl, skewer, or knife
  • A rolling pin
  • A drop cloth, piece of canvas, or craft mat
  • Two “guide” items, approximately 1/8 inch thick (these can be pieces of wood or notebooks, for example)
  • Wire
  • Spray bottle of water if you use a cloth work surface
  • Sponge (optional)

Instructions:

step \1: lay out your canvas work surface. using your wire, cut a wedge out of  18
Step 1: Lay out your canvas work surface. Using your wire, cut a wedge out of your clay. Wet your hands and work or squeeze the clay to soften it. Press the clay flat with your hands.
step \2: if you are using a cloth work surface, such as canvas, wet it with a b 19
Step 2: If you are using a cloth work surface, such as canvas, wet it with a bit of water to prevent the clay from sticking. Then place the clay between your guides and gently roll until your rolling pin hits your guides. This techniques ensures an even thickness of the clay. To prevent sticking, lift the clay and turn it over several times.
step 3: use your your circular guide to cut out circles from the clay. 20
Step 3: Use your your circular guide to cut out circles from the clay.
diy holiday votives shaping 2
Step 4: Place plastic wrap over your mold. Lay the clay over the plastic. Use your thumbs to gently pull the clay down to cover the mold., then gently peel the clay off the mold.
diy holiday votives shaping 3
Step 5: Allow the clay to dry for a couple of hours until it is “leather hard,” i.e. the clay holds its shape but you can still manipulate it. Wet your fingers and use them to smooth the edges. You can also use a knife to even out the edge of your vessel and a dampened sponge to smooth the surface. Be careful not to use too much water as it will weaken the clay.
diy holiday votives drying
Step 6: If the clay dries too fast it may crack. To avoid this, place a bit of plastic loosely over the clay. The clay should dry in a day or two. This clay is more off-white when it dries. For pure white, you can paint the pots or try DAS Air-Hardening Modeling Clay – White; $11. Make sure your votive holders are completely dry before applying any sealer or paint.
diy holiday votives 1
Above: I finished my votives with glaze in my pottery class. Your finished votives will be porous and therefore not waterproof. You can make them water resistant by applying a clear polyurethane varnish or an acrylic sealer. You can also paint your votives with acrylic paint.
DIY Easy Ceramic Votive Holders for a Festive Table portrait 8
Above: I used evergreens foraged from my yard to create this seasonable table.
DIY Easy Ceramic Votive Holders for a Festive Table portrait 8
Above: I simply placed a votive in my small pots. One could also fill the whole bowl by adding a votive wick and melted wax.
diy holiday votives close up
Above: The finished product, simple and festive.

Looking for more easy, low-cost holiday DIYs?

(Visited 2,605 times, 1 visits today)
You need to login or register to view and manage your bookmarks.

Product summary  

Have a Question or Comment About This Post?

Join the conversation

v5.0