During our recent remodel, I installed a pair of Industrial Pendant Glass lights from West Elm in our dining room. I loved their overall look (and price), but I found that the shiny nickel hardware and white plastic cord were all that I noticed for months (the problem was particularly glaring because our room has gold and brass overtones). So, after a year of living with a less-than-perfect situation, I decided to take matters into my own hands. For less than $7, I like to think I completely changed the look of the lamps. See if you agree.
Photography by Izabella Simmons unless noted.

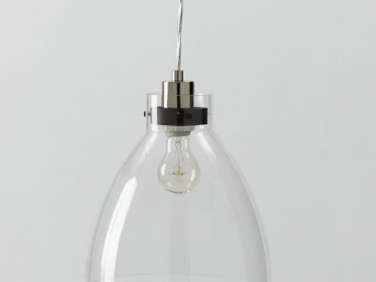
Above L: The Industrial Pendant Glass lights from West Elm ($99 each) before. Above R: The pendants lights after a coat of liquid gilding paint in brass. I used a sample pint of leftover charcoal paint from Sherwin Williams to paint the cord.

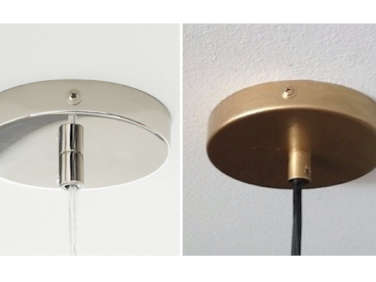
Above: L: The West Elm Conversion Kit in Polished Nickel, a necessary add-on for mounting the light on the ceiling; $25. Above R: The kit after I painted it.
Paint

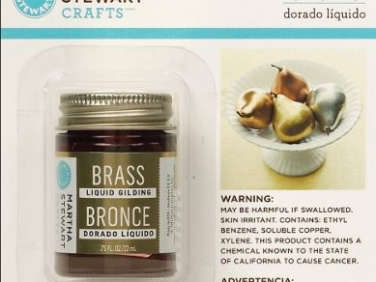
Above: I covered the polished nickel fittings in Martha Stewart’s Liquid Gilding Paint in Brass; $6.98 from Amazon (copper and gold also available). The oil-based color adhered well, so no need to use a primer. Photo by Chelsea Costa of Lovely Indeed via Poppy Talk.
Finished Project

Above: We call our dining room the Parisian Room, thanks to our salvaged French mirror and brass vitrine that make our upgraded pendants look right at home.
Another easy DIY with paint? Check out Gardenista’s Envy-Inducing Planters (Spray Paint is Involved). Looking for more brass lamps? Consider these Brass Pendants from Allied Maker.
Have a Question or Comment About This Post?
Join the conversation