Decor-wise Halloween has never been my holiday. Christmas sparkle and Easter florals certainly inspire, but to me all those gravestones and ghouls are just, well, monstrous.
But this year a comment from my mother prompted me to try a different approach. While shopping in an antiques store, she declared, “I hate old things. They’re always so creepy.” While I myself love storied objects, I knew what my mother meant: Sprinkled here and there, vintage pieces add soul. Unrelentingly layered, without anything fresh or new, they become somewhat morbid.
Which is good if you that’s the effect you’re going for.
Thus inspired, this year I thought I’d take advantage of my own upcoming front hall and stairway renovation to get into the spirit of things, so to speak. Using only vintage items that I already own, plus ancestral portraits gathered from my family, I created an homage to Halloween–and for $0. Utterly devoid of pumpkins and witches, it’s not your average child’s play. Which, to me, makes it all the more haunting.
Photography by Justine Hand for Remodelista.

Above: A gilded vignette conjures the feeling of faded grandeur.
For my haunted hall, I wanted to evoke the aura of a gothic tale–eerie, but not grotesque and certainly not hokey. After all, my family and I have to live in this space. So I opted for a subtly disturbing approach, one that creeps up on you. Here, using the antique journals of my house’s original owners as a launching point, I created a gilded assemblage. With my grandmother’s candlesticks, dried hydrangeas, and some old portraits, it’s almost pretty, until you realize it’s all dead.

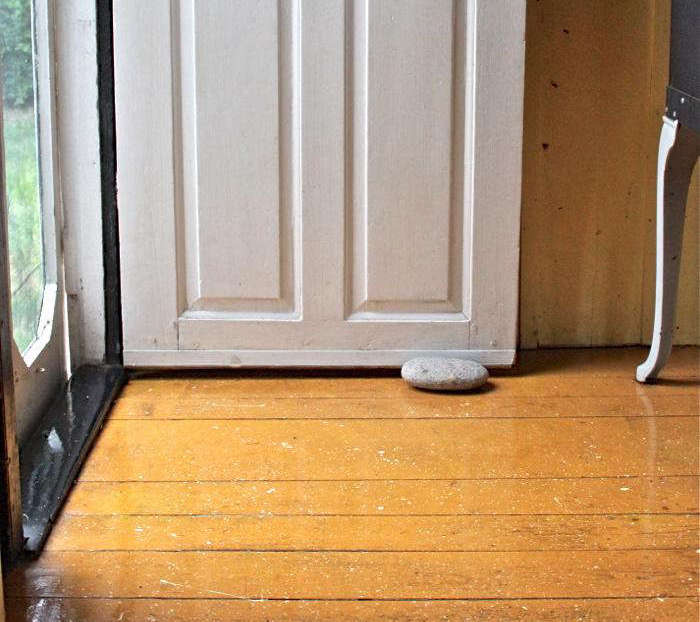
Above: With its long narrow stair, my front hall is quintessentially creepy. It even has a black door that creaks when you open it. The chipped paint and strip of raw wood from an original runner were recently revealed under a thick green carpet (see below) that I spent much of last Thursday removing. All I added was an antique mirror, a bit of cheese cloth at the top, and lots of dried leaves.

Above: On the stairs, an old doll and a handwritten letter whisper of past lives, once rich, now gone.

Above: An ode to Miss Havisham: taking advantage of that archetypal scary spot under the stairs, I put my wedding veil to use.
I employed allegorical vignettes to engage my visitors’ sense of fantasy. What is going on here? Who is the woman in the portrait? Did she meet some sinister end? And what’s with the key? In this context, objects that usually suggest a happy beginning (like a veil) or innocence (like the doll on the stairs) are much creepier than ghoulish recordings and fake webbing.

Above: An old journal, leaves, and a veil. Clues to some macabre mystery?

Above: As we saw earlier this week, empty frames and ancestral portraits are quite effective when striving for a spectral effect.

Above: Dessicated and brittle, dead leaves strewn about the hall suggest neglect and decay.

Above: The only color in the room, last month’s dried hydrangeas resurrected.

Above: Soon to be replaced by something more current and less shiny, my hall chandelier enjoys one last hurrah. Here, I used a combination of antique silk and silver thread (from Michael’s) to create the remains of a web.

Above: Except for a trio of small portraits at the top and a mirror at the bottom, I left the stair wall blank to emphasize the long, lonely ascent to the top.

Above: True horror: the green carpeting that came with our house, shown in a “Before” image. Ripping it off the stairs was so liberating. “Like taking a sack cloth off a woman with a gorgeous figure,” was how my aunt put it. Once Halloween is over, I look forward to the real renovations. Stay tuned…
N. B. Looking for another easy approach to Halloween? Try a little black paint.


Have a Question or Comment About This Post?
Join the conversation